Create a Dataset
This documentation provides a detailed overview of how to create a dataset
Creating datasets is the essential first step to making your data usable in Obsrv. This guide details the process using the user interface wizard. You’ll learn how to define your dataset’s structure, configure ingestion and processing rules, select storage options, and finally publish it for active use.
1. Navigate to Dataset Creation
Section titled “1. Navigate to Dataset Creation”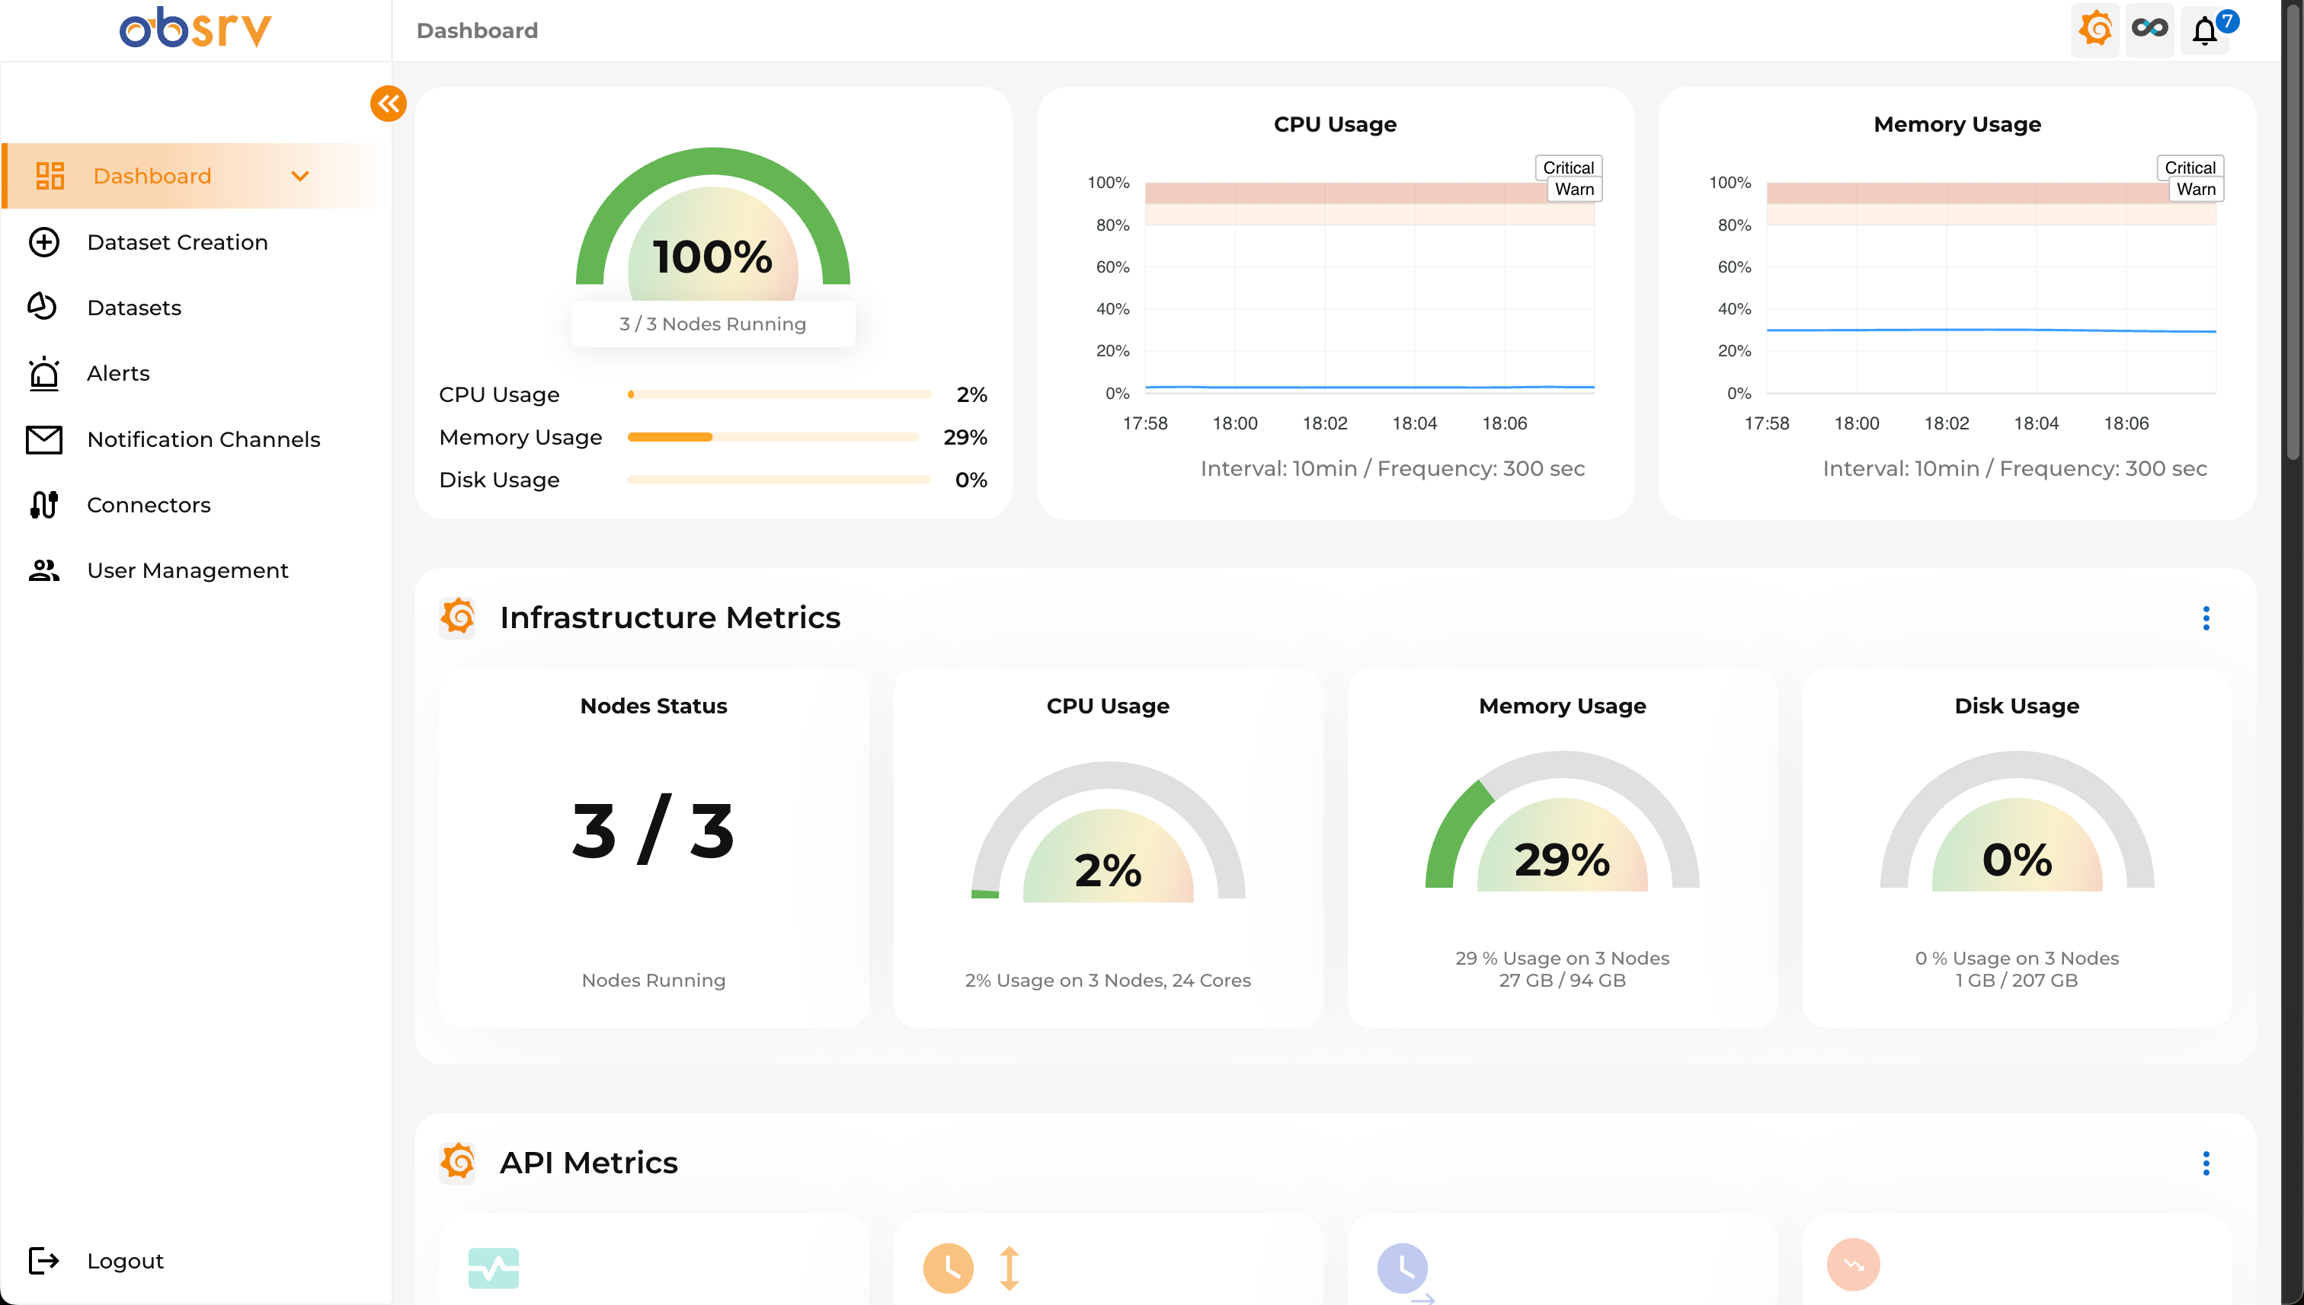
- From the main Dashboard, locate the left-hand navigation menu.
- Click on the Dataset Creation option.
2. Initiate New Dataset
Section titled “2. Initiate New Dataset”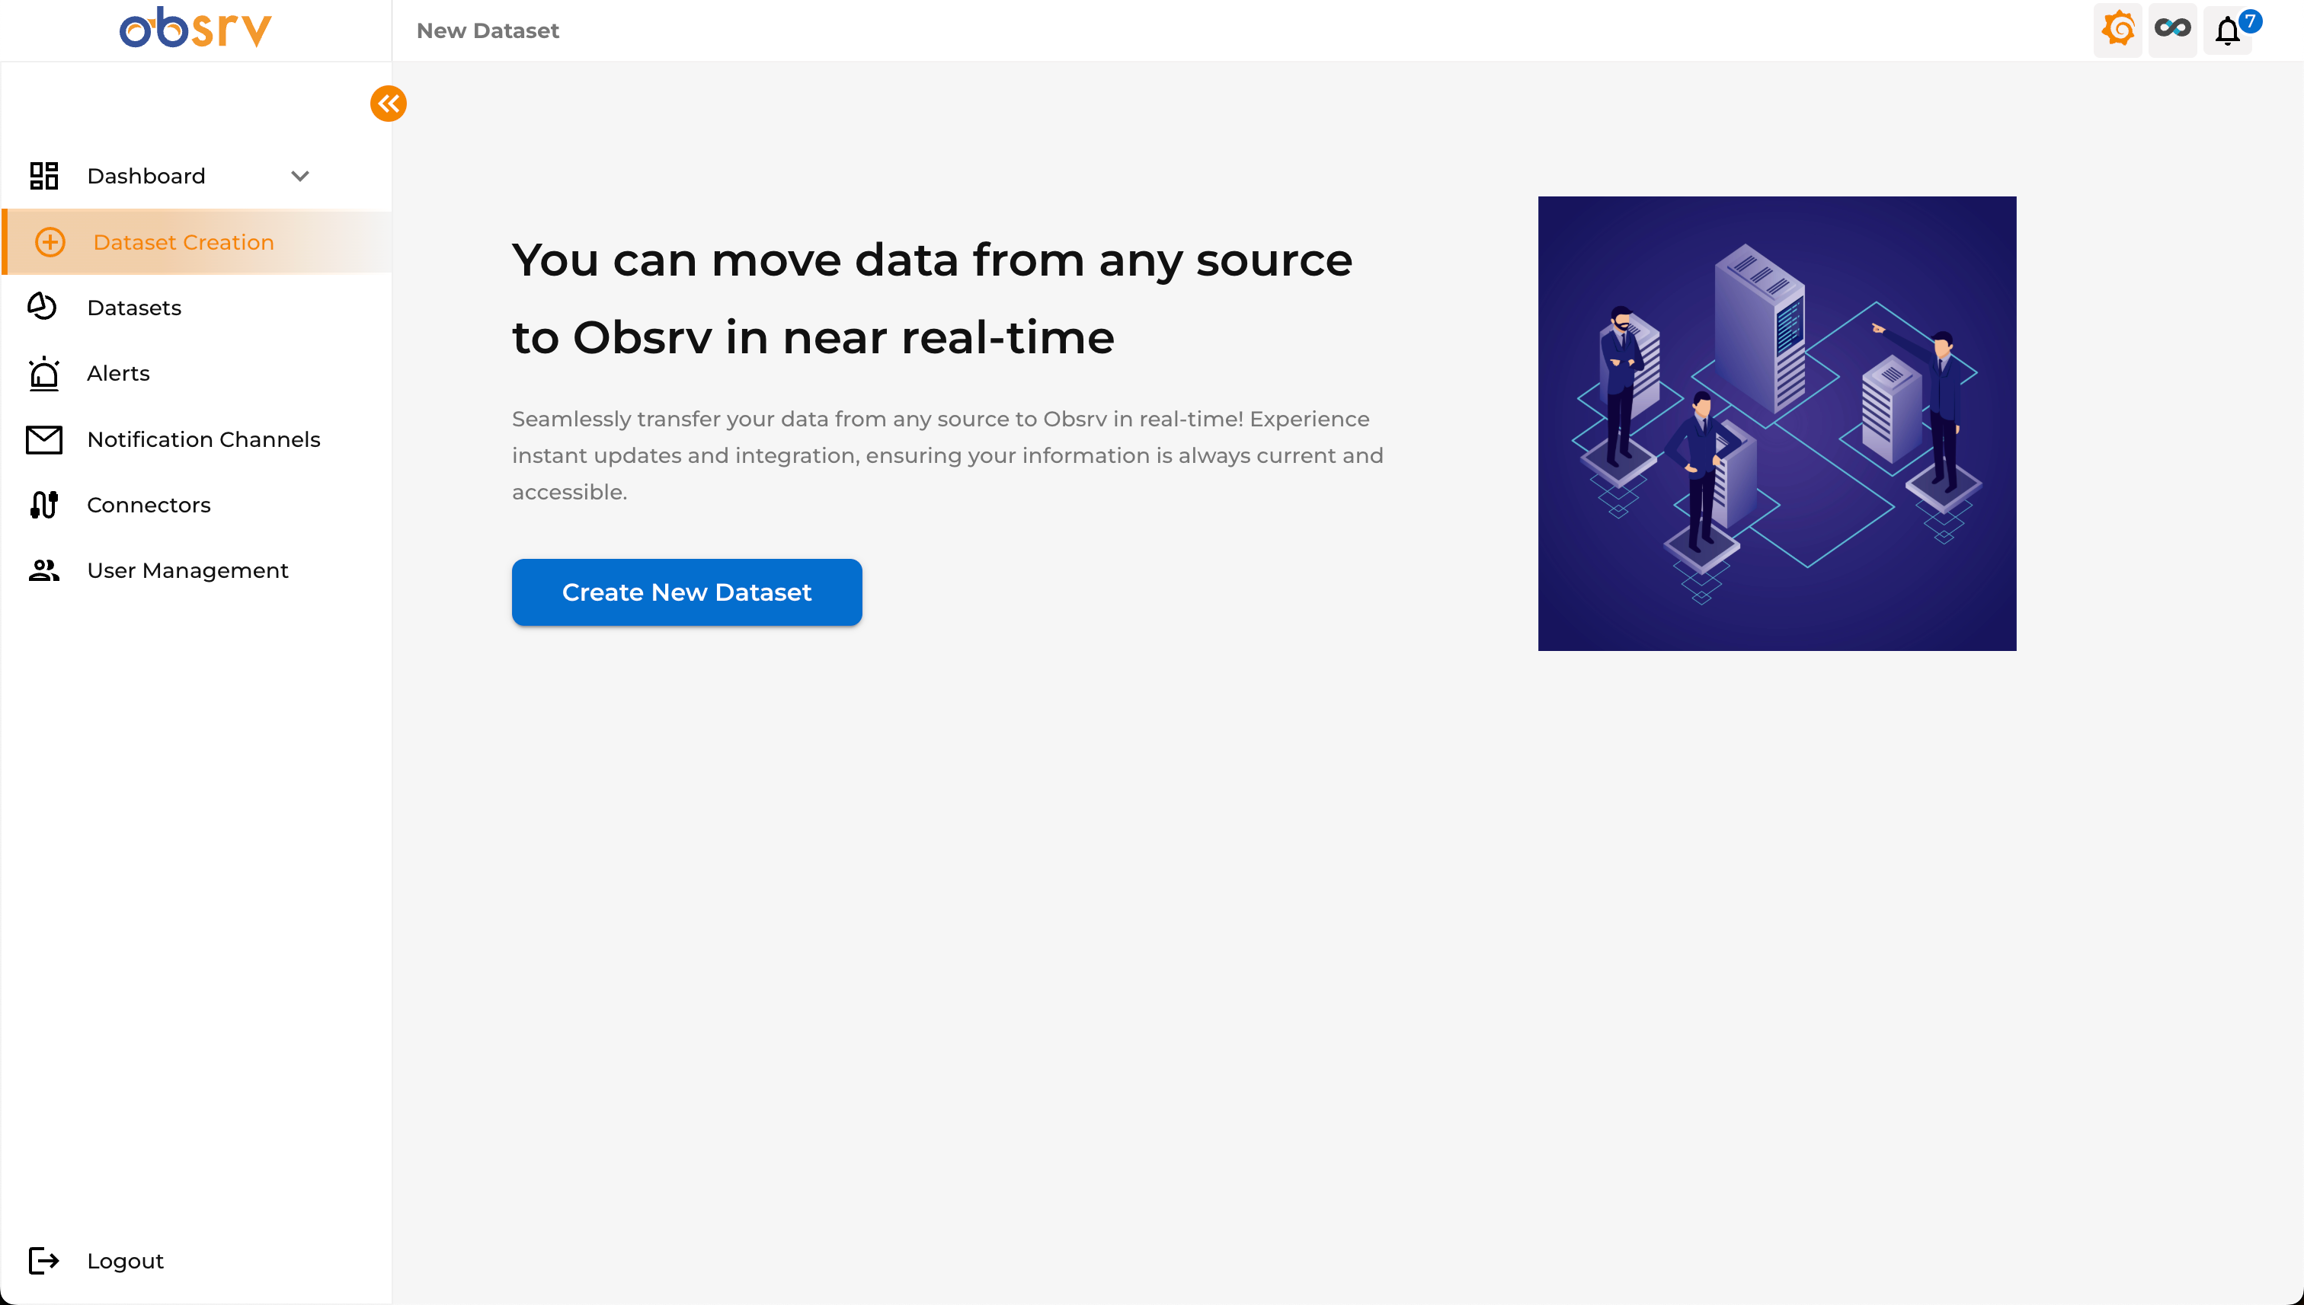
- You will land on the “New Dataset” page.
- Click the Create New Dataset button to begin the setup wizard.
3. Connector Selection (Optional)
Section titled “3. Connector Selection (Optional)”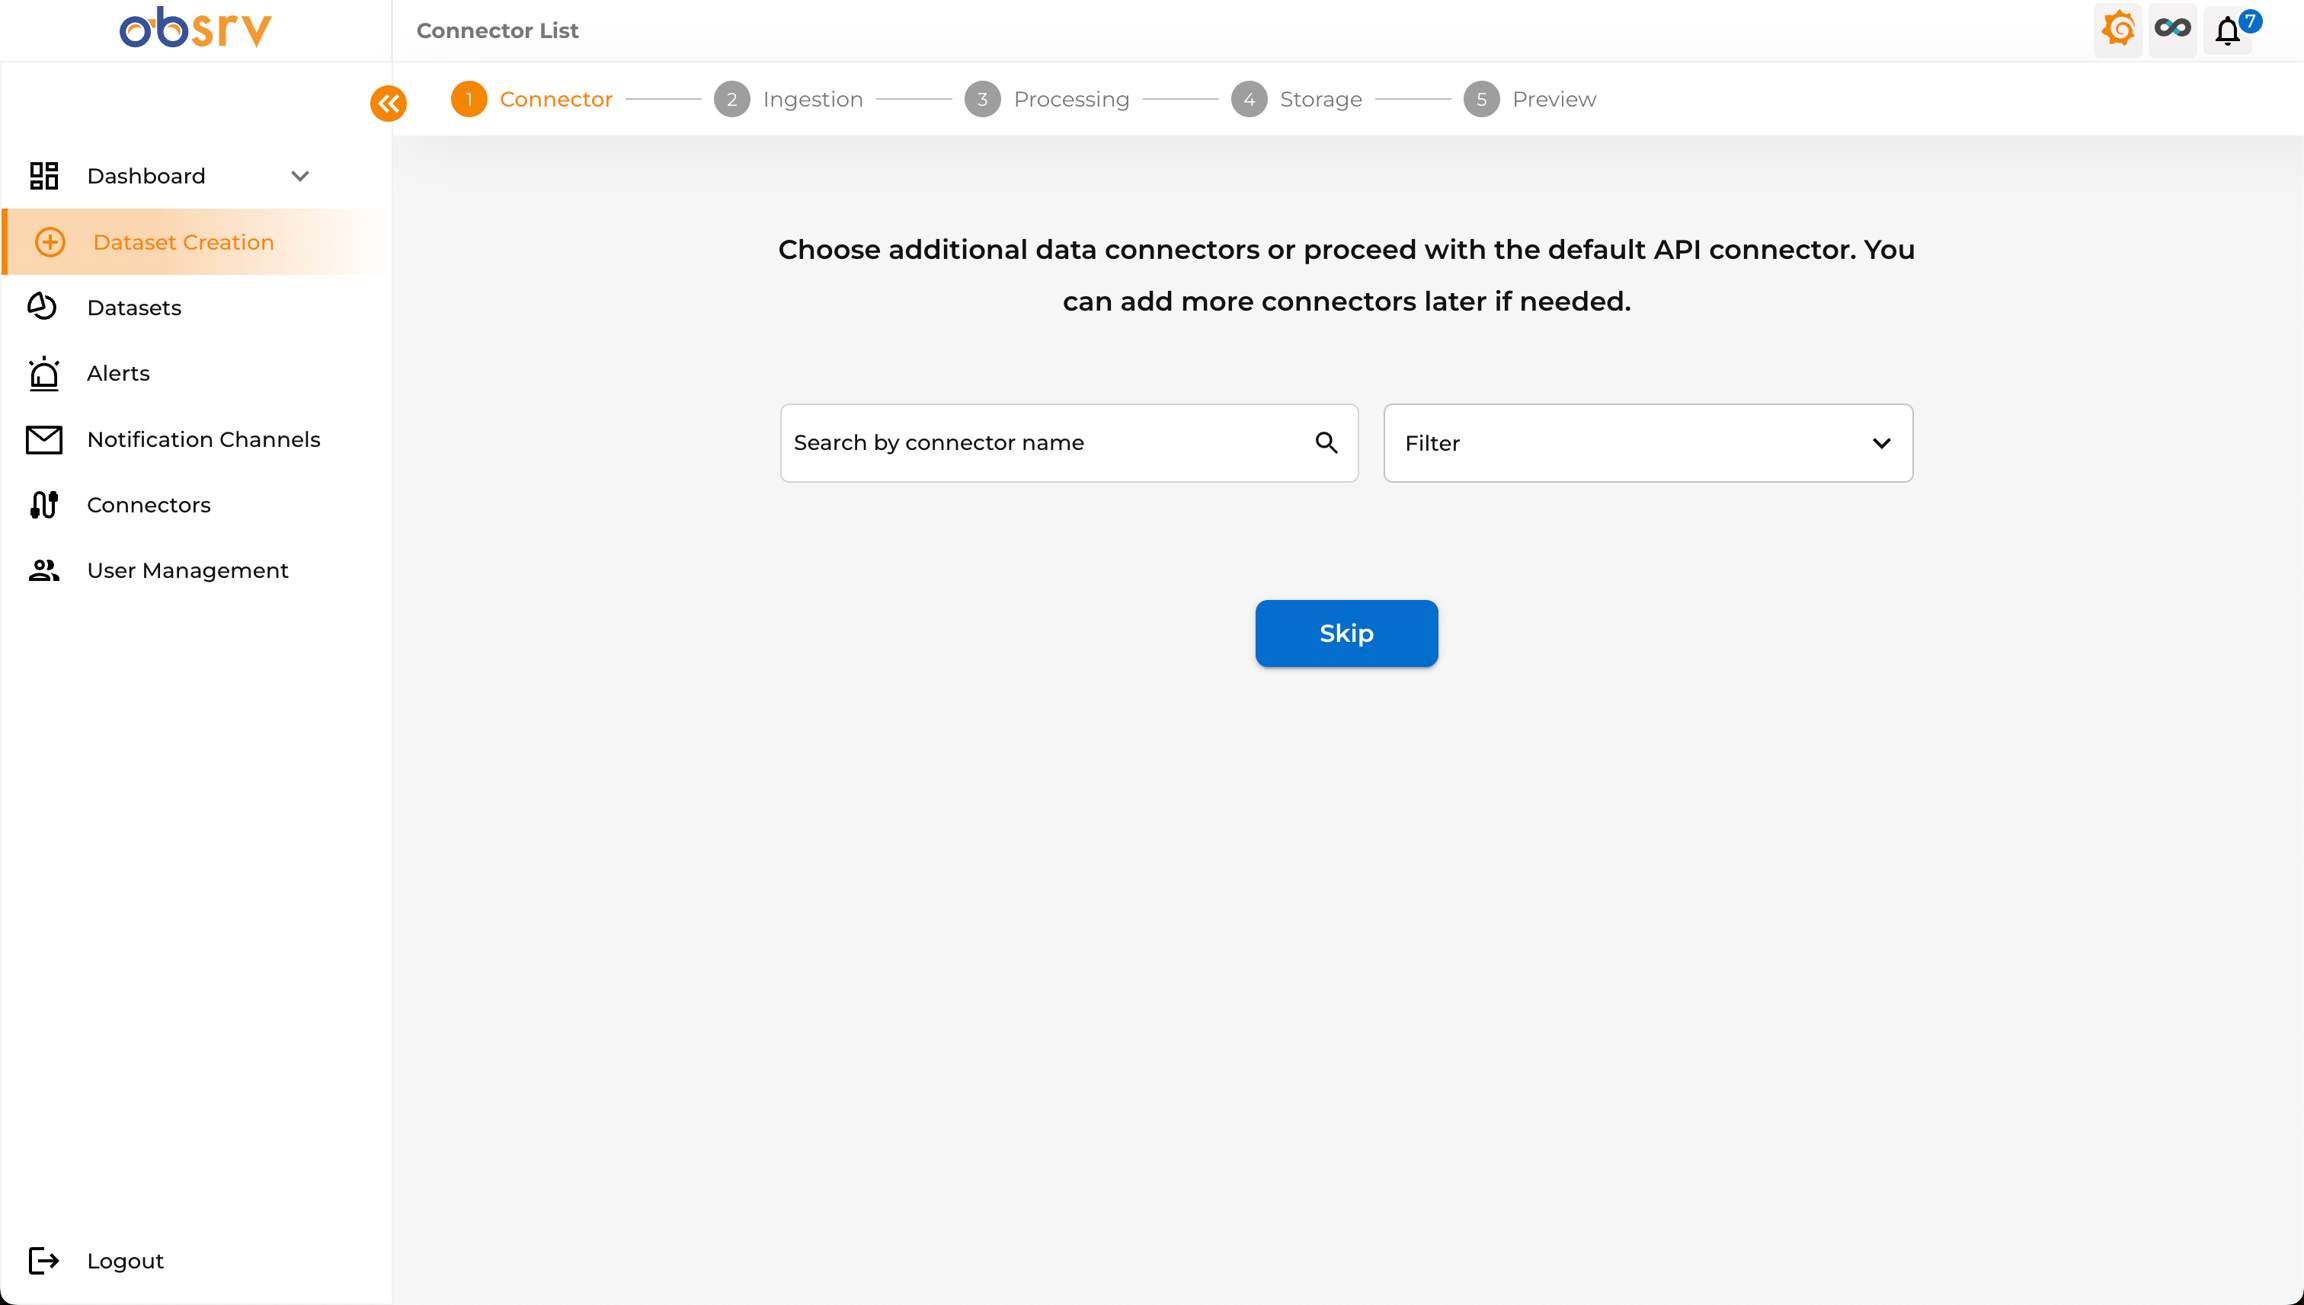
- The wizard starts at the Connector step (Step 1).
- This step allows you to choose a data connector if needed. For a basic setup using the default API, you can skip this.
- Click the Skip button to proceed with the default configuration. Connectors can be added later if required.
4. Configure Ingestion — Dataset Details
Section titled “4. Configure Ingestion — Dataset Details”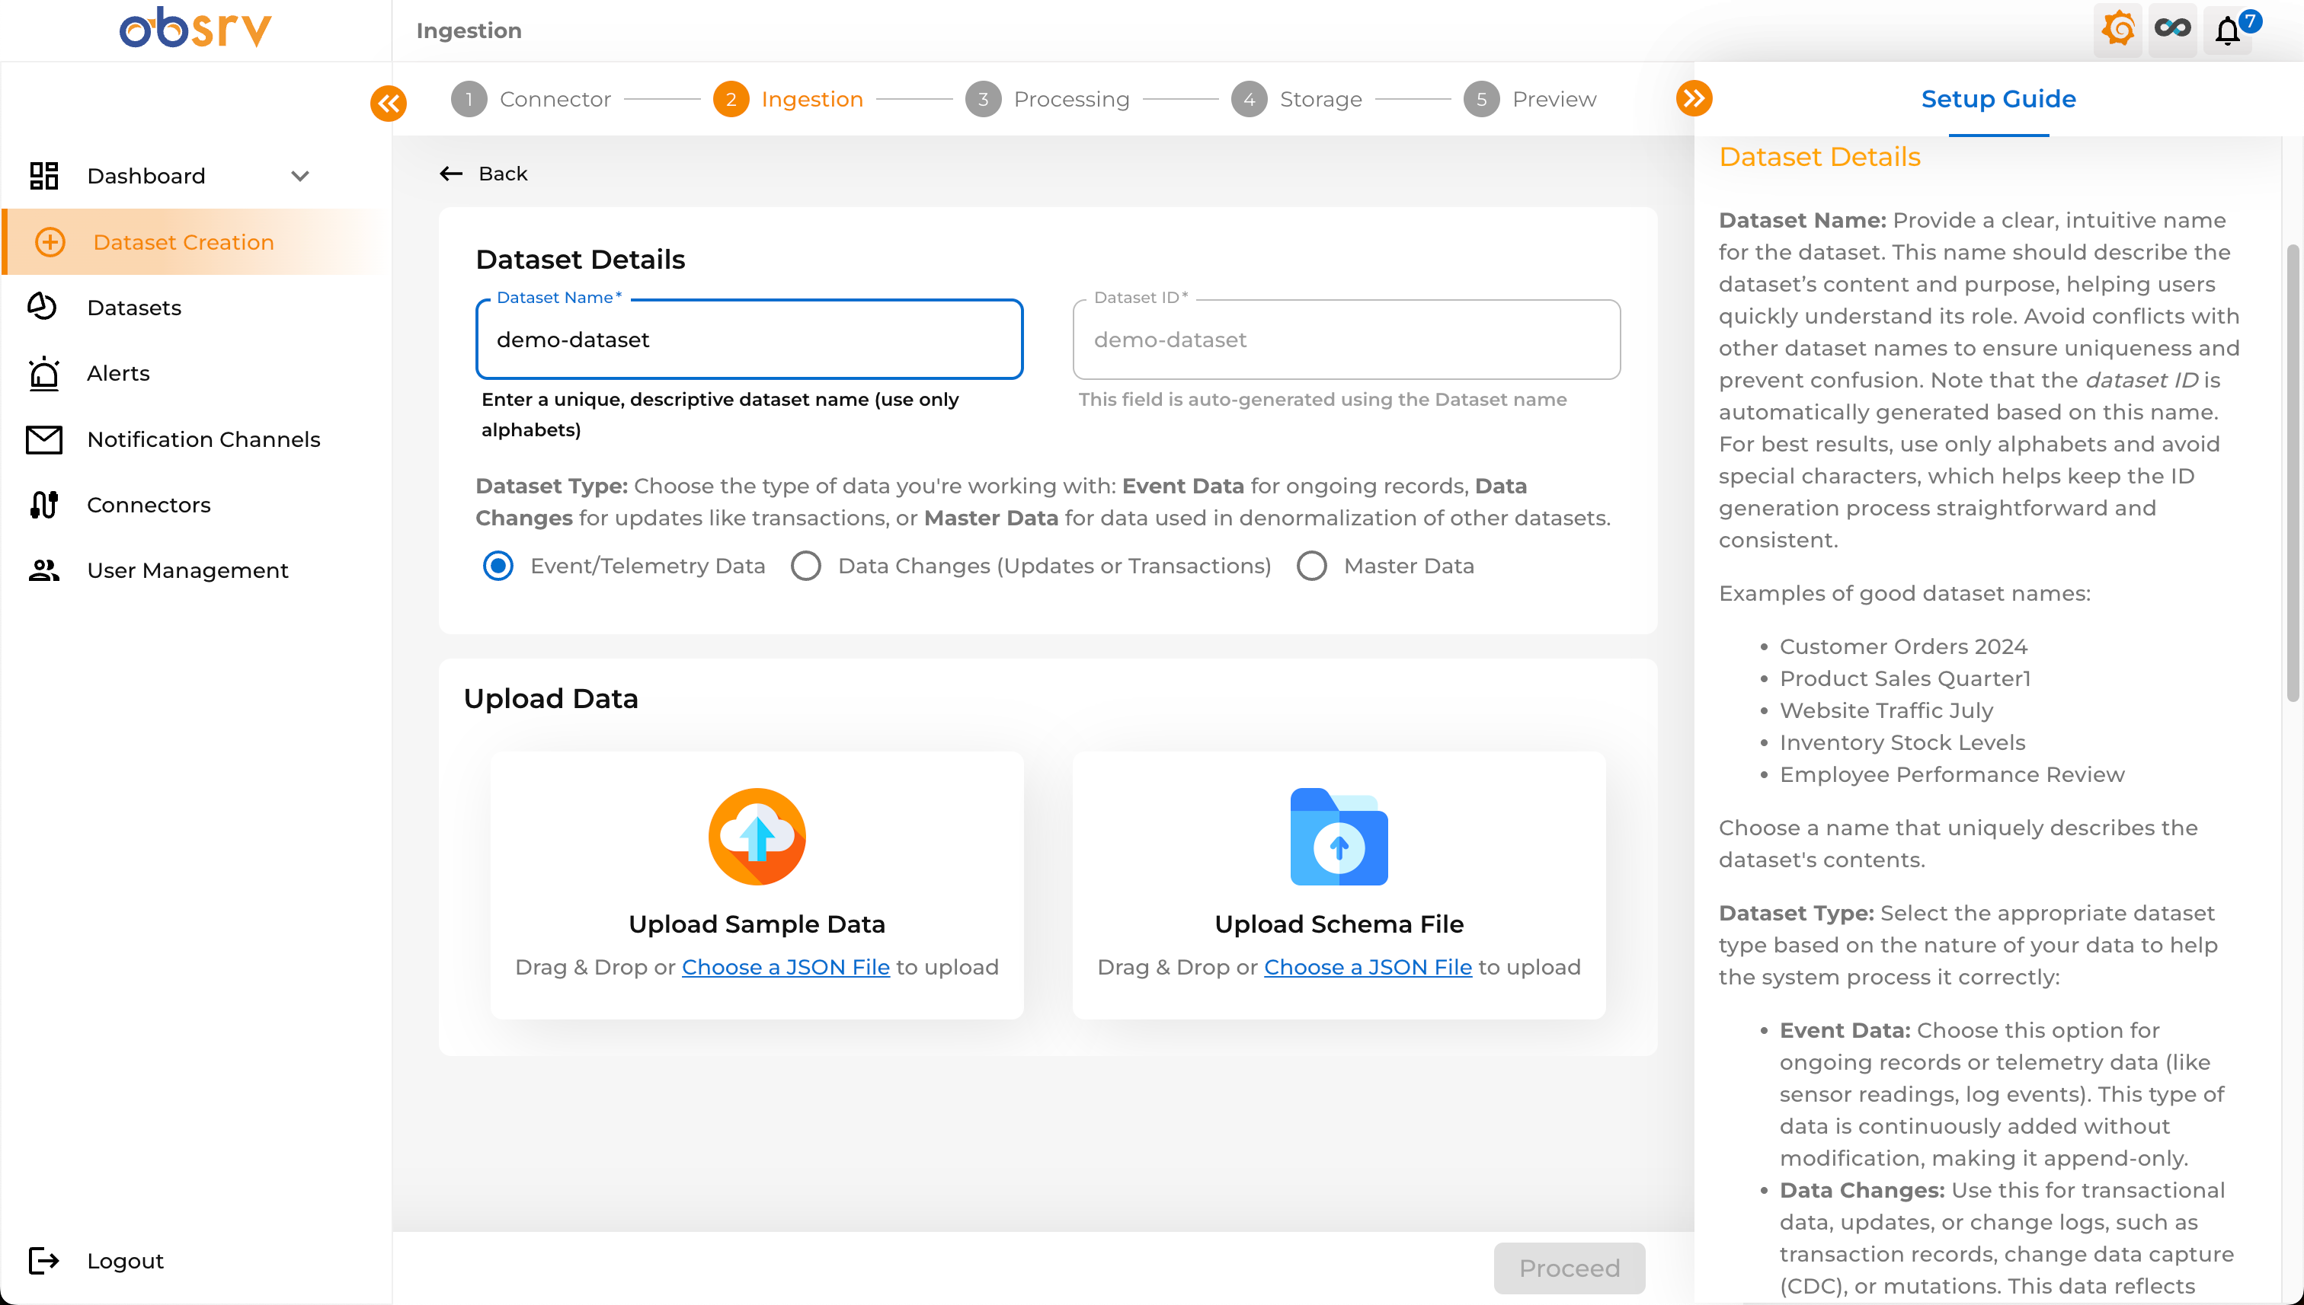
- You are now on the Ingestion step (Step 2).
- Dataset Name: Enter a unique, descriptive name for your dataset (e.g.,
demo-dataset). Use only alphabets and avoid special characters for better ID generation. - Dataset ID: Auto-generated based on the Dataset Name. You can leave it as is.
- Dataset Type: Choose the type that best describes your data:
- Event/Telemetry Data: For ongoing, append-only data like logs or sensor readings.
- Data Changes (Updates or Transactions): For data that involves updates to existing records (CDC).
- Master Data: For reference data used to enrich other datasets (denormalisation).
5. Upload Data/Schema
Section titled “5. Upload Data/Schema”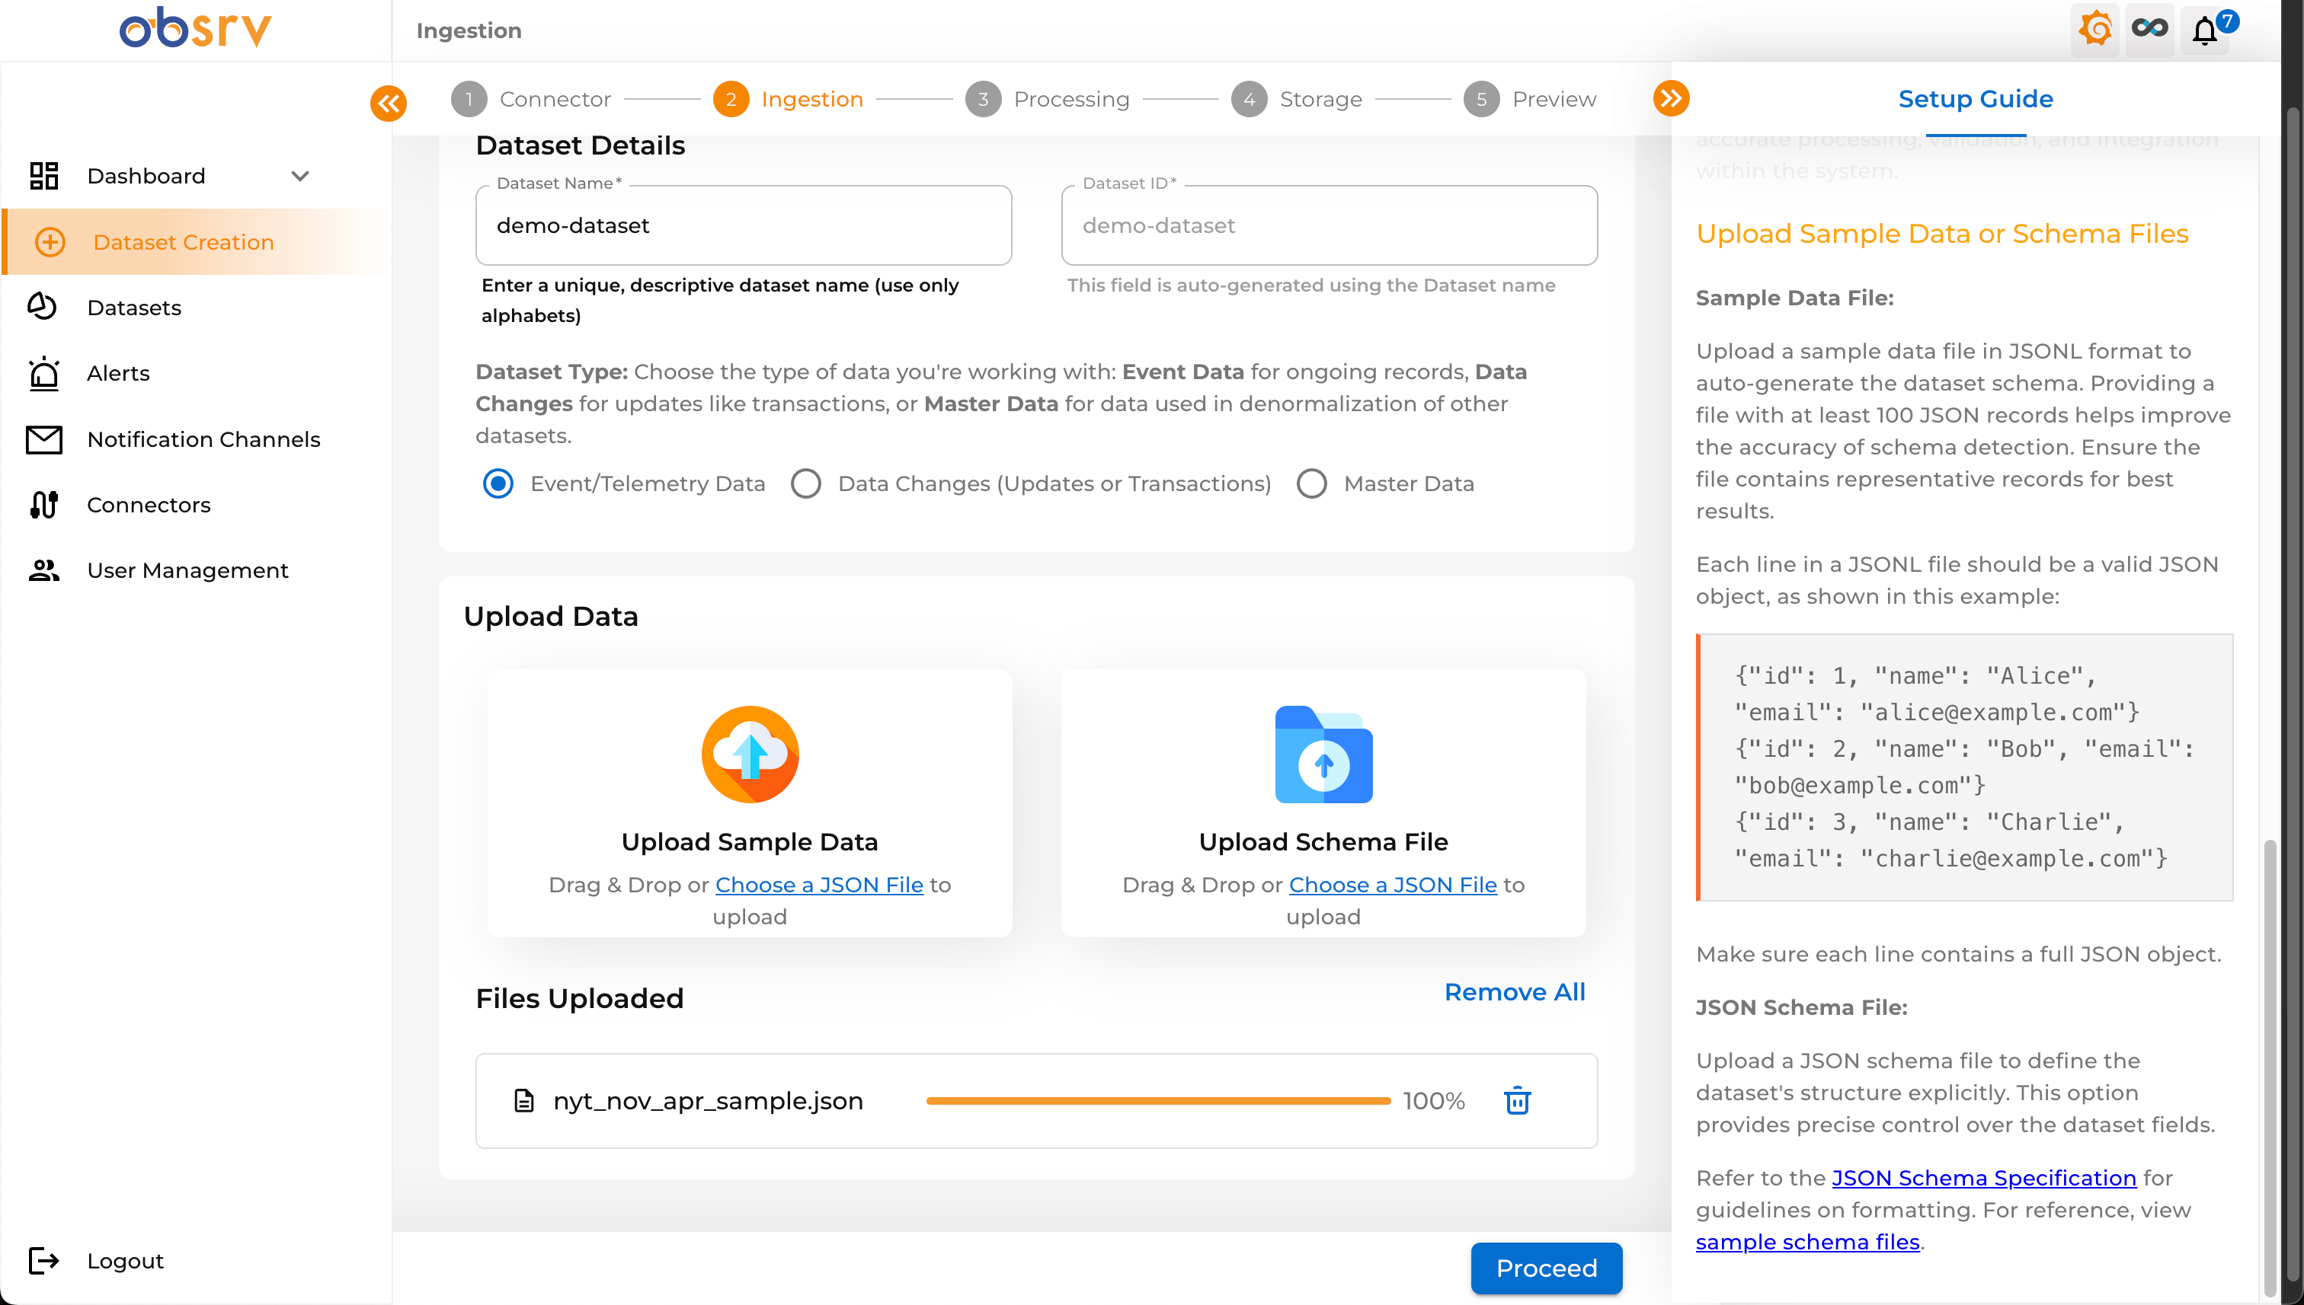
- Scroll down to the Upload Data section.
- You have two options:
- Upload Sample Data: Drag and drop your JSONL sample file onto the designated area, or click Choose a JSON File to browse. This is used for schema inference. Providing a file with at least 100 JSON records helps improve the accuracy of schema detection.
- Upload Schema File: If you have a predefined JSON schema, upload it here instead.
- Once your sample file is successfully uploaded (progress bar reaches 100%), click Proceed.
6. Review Schema Details
Section titled “6. Review Schema Details”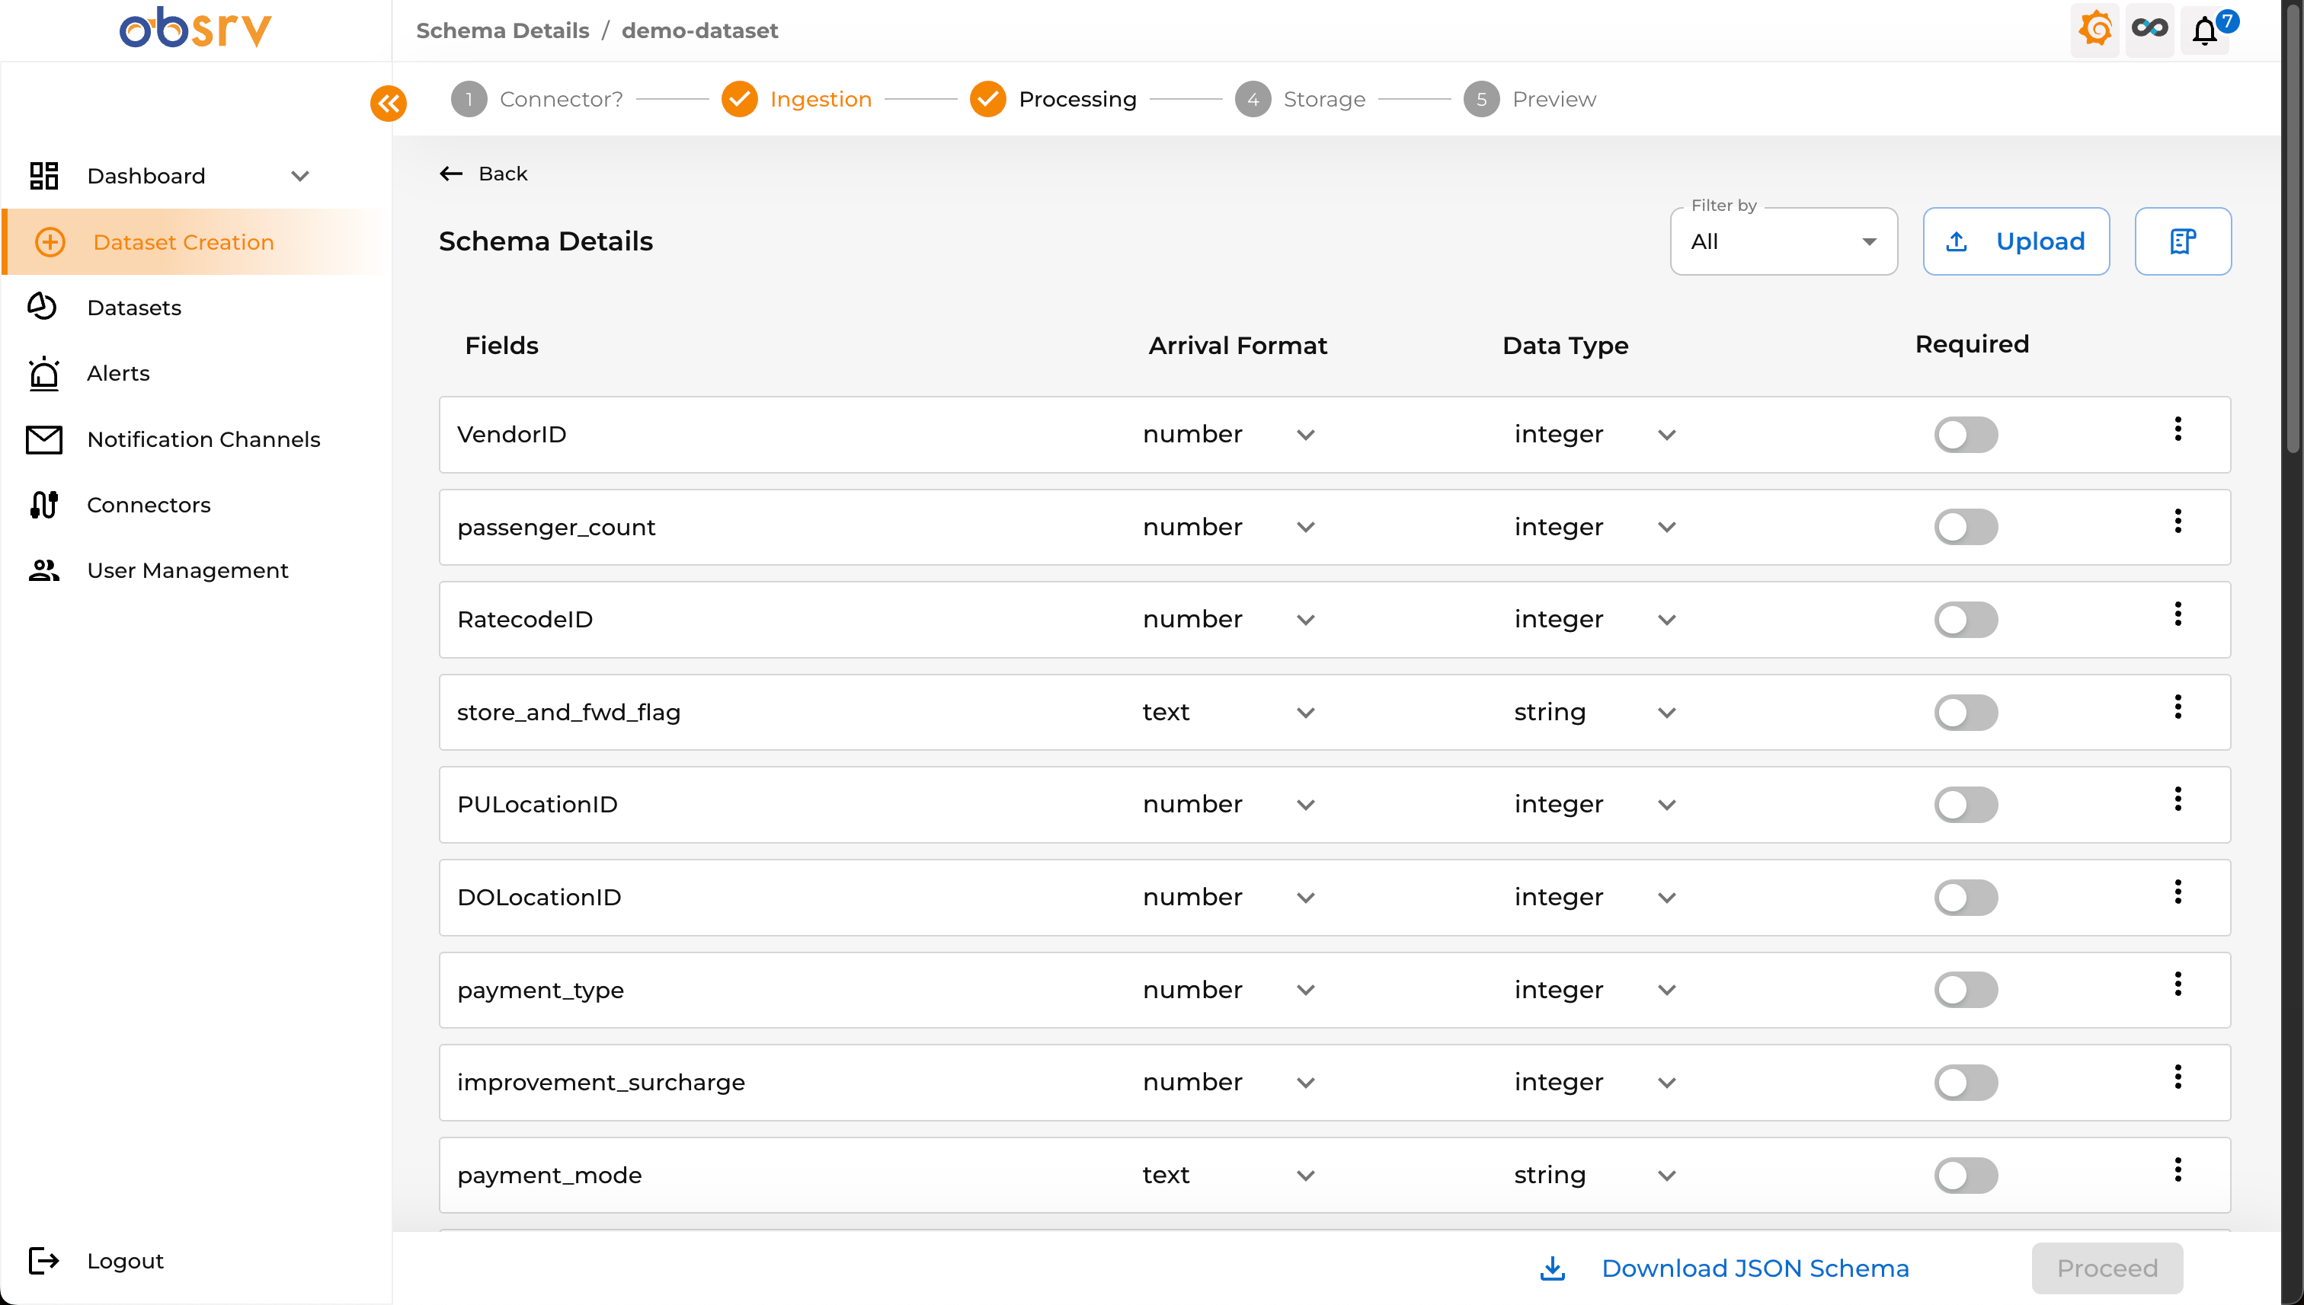
- Obsrv infers the schema from your sample data and displays it.
- Review the generated Schema Details:
- Fields: The names of the fields detected in your data.
- Arrival Format: The format detected in the JSON (e.g., number, text, object).
- Data Type: The proposed data type for storage and querying (e.g., integer, string, date-time, double).
- Required: Toggle to mark if a field must be present in every record.
7. Address Recommendations and Conflicts
Section titled “7. Address Recommendations and Conflicts”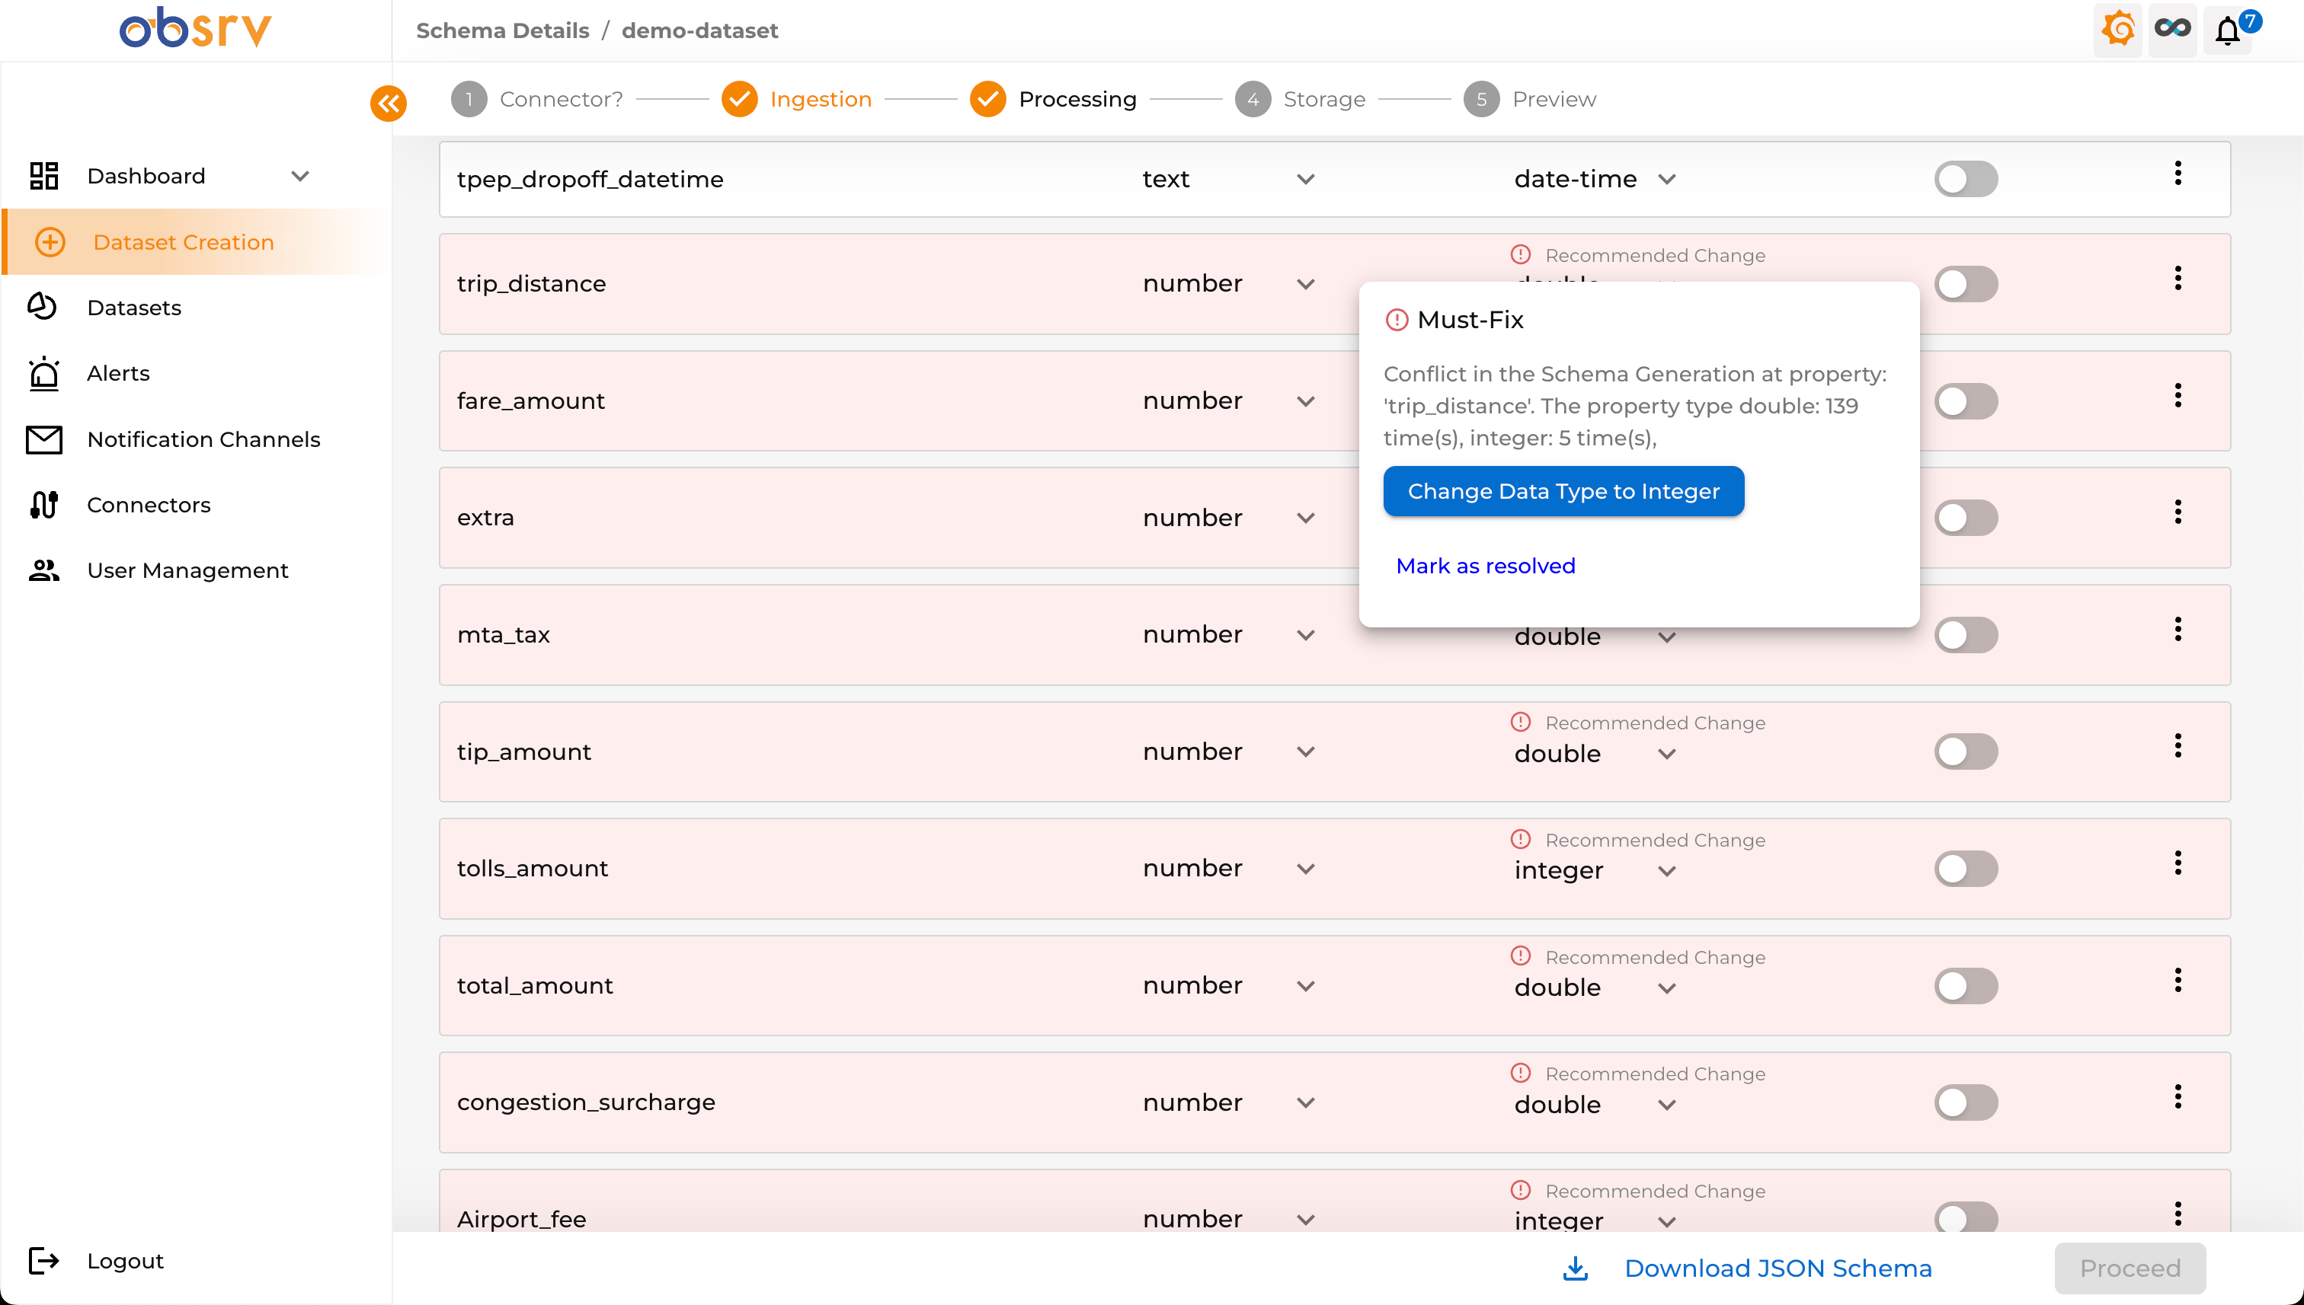
- Obsrv may suggest Recommended Changes for data types (e.g., changing a number to integer).
- Sometimes a Must-Fix conflict appears if the sample data suggests conflicting types for the same field.
- Click the warning icon next to a field with a conflict to see the details.
- Choose a resolution: Change Data Type to the recommended value, or Mark as resolved if you want to keep the current type.
- Repeat until all conflicts are addressed.

- Once all rows show a Resolved status (green), you can proceed.
8. Add Fields (Optional)
Section titled “8. Add Fields (Optional)”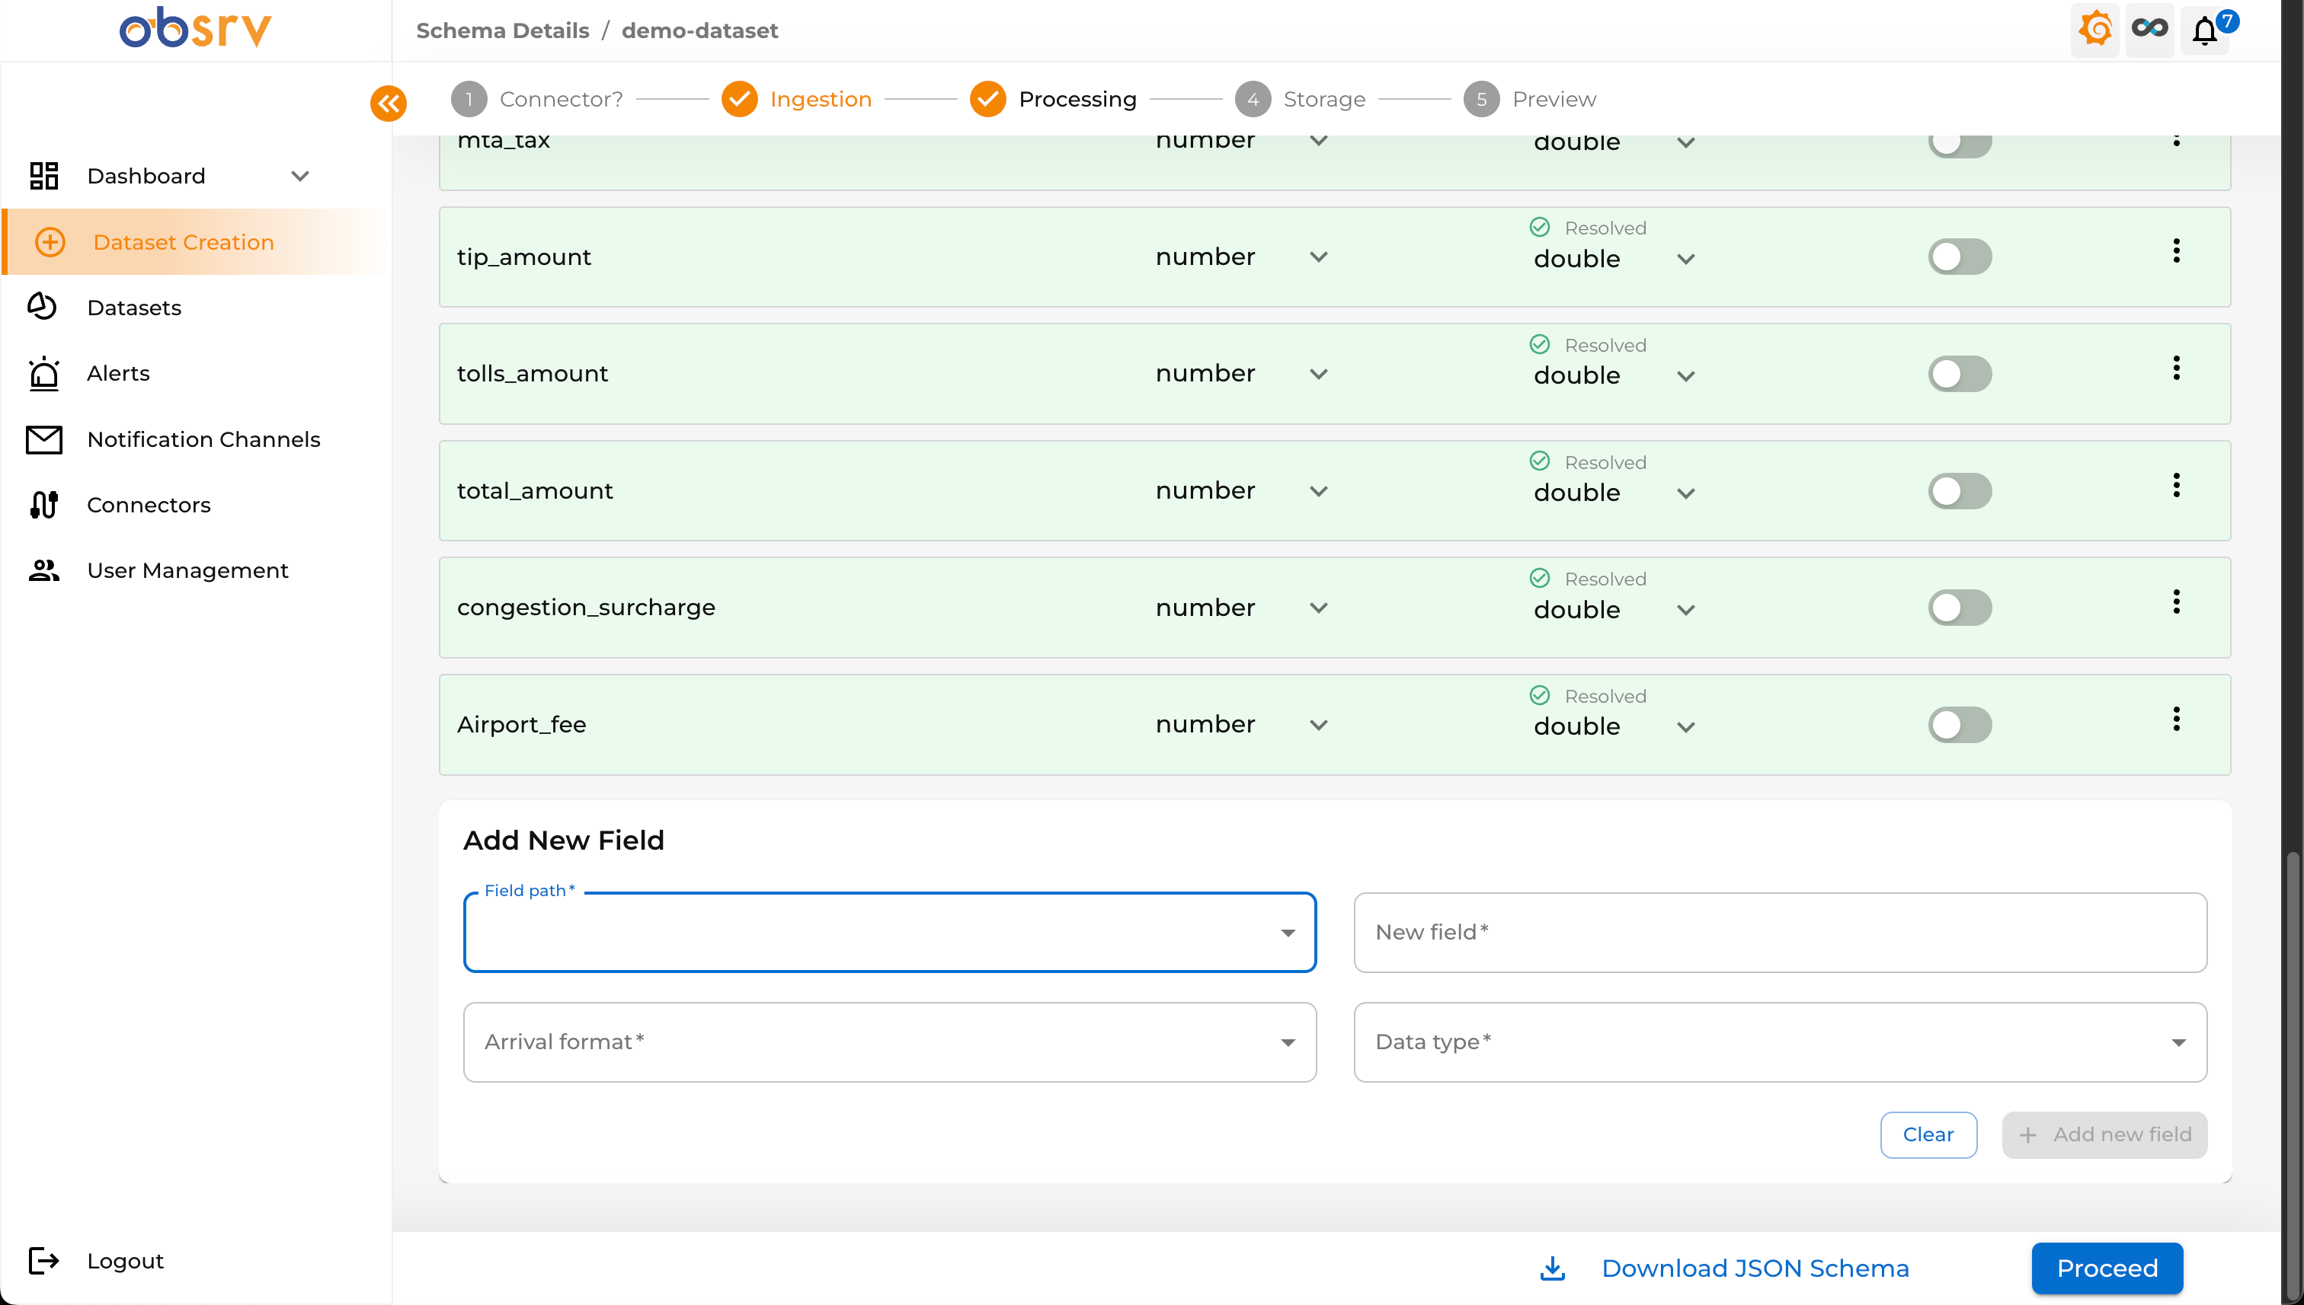
- If your sample data didn’t include all necessary fields, scroll to the bottom of the Schema Details page.
- Use the Add New Field section by specifying the Field path, New field name, Arrival format, and Data type.
- Click + Add new field to add it to the schema.
- Once the schema review is complete, click Proceed.
9. Configure Processing
Section titled “9. Configure Processing”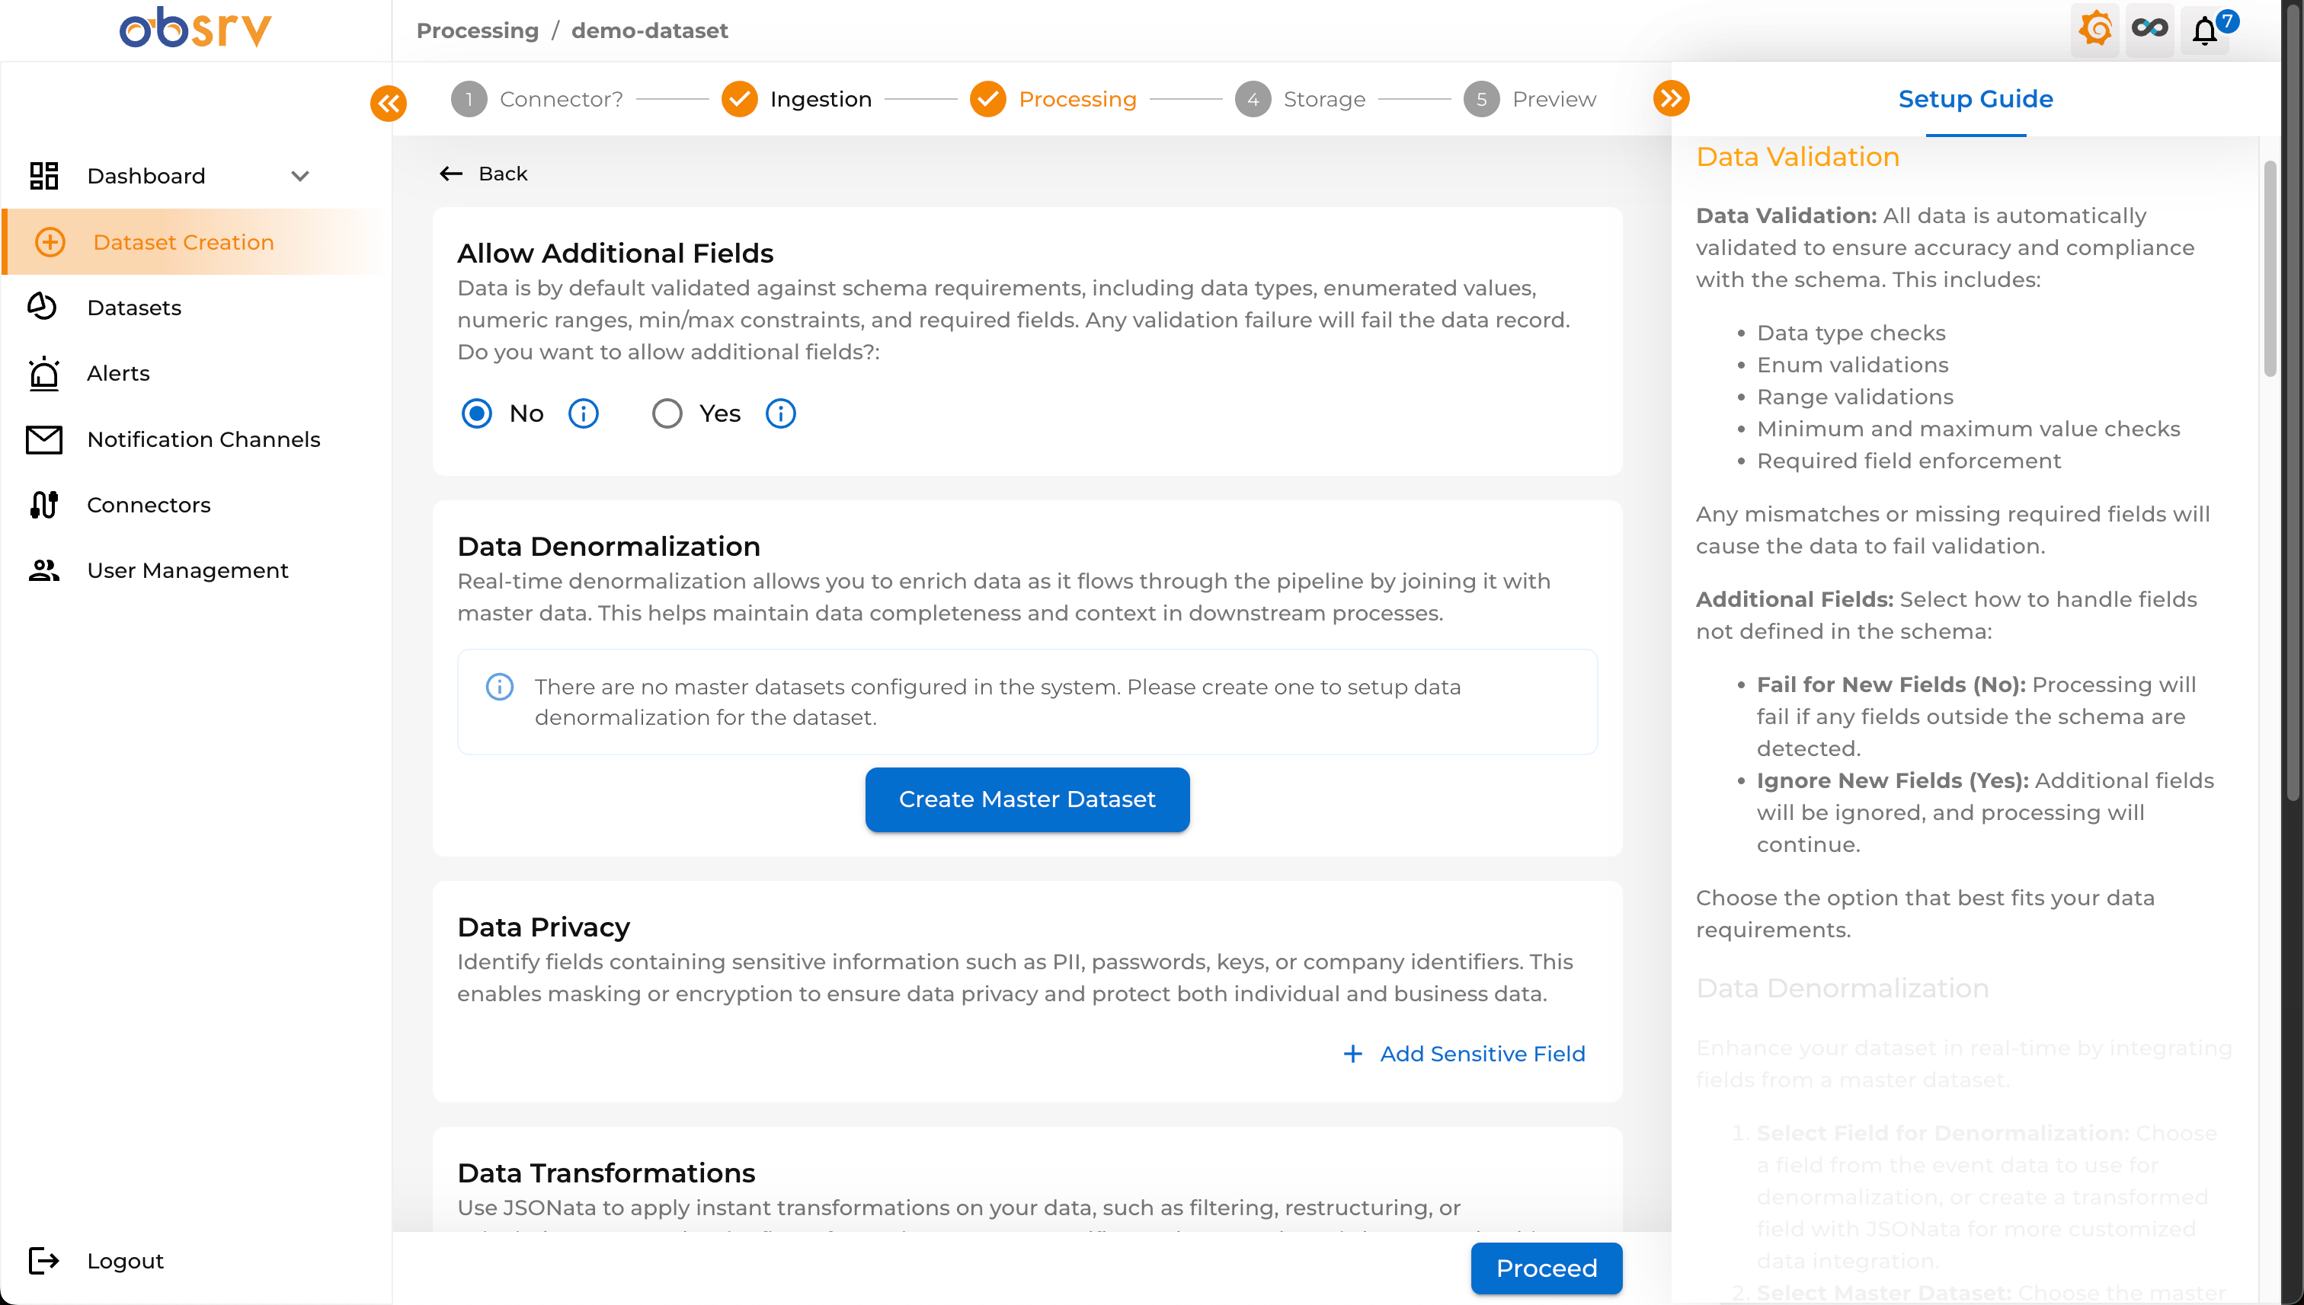
- You are now on the Processing step (Step 3).
- Allow Additional Fields: Choose Yes or No — whether records with fields not in your schema are allowed or rejected. Any validation failure will fail the data record.
- Data Denormalization: Configure joins with Master Datasets to enrich records as they flow through the pipeline.
- Data Privacy: Define masking or encryption rules for sensitive fields (PII). Click + Add Sensitive Field to configure.
- Data Transformations: Apply custom transformations using JSONata. Click + Add Transformation.
- Derived Fields: Create new fields based on existing fields using JSONata. Click + Add Derived Field.
- Data Deduplication: Enable to prevent duplicate records. Toggle Enable Deduplication and select the unique key field.
- Configure options as needed for your use case, then click Proceed.
10. Configure Storage
Section titled “10. Configure Storage”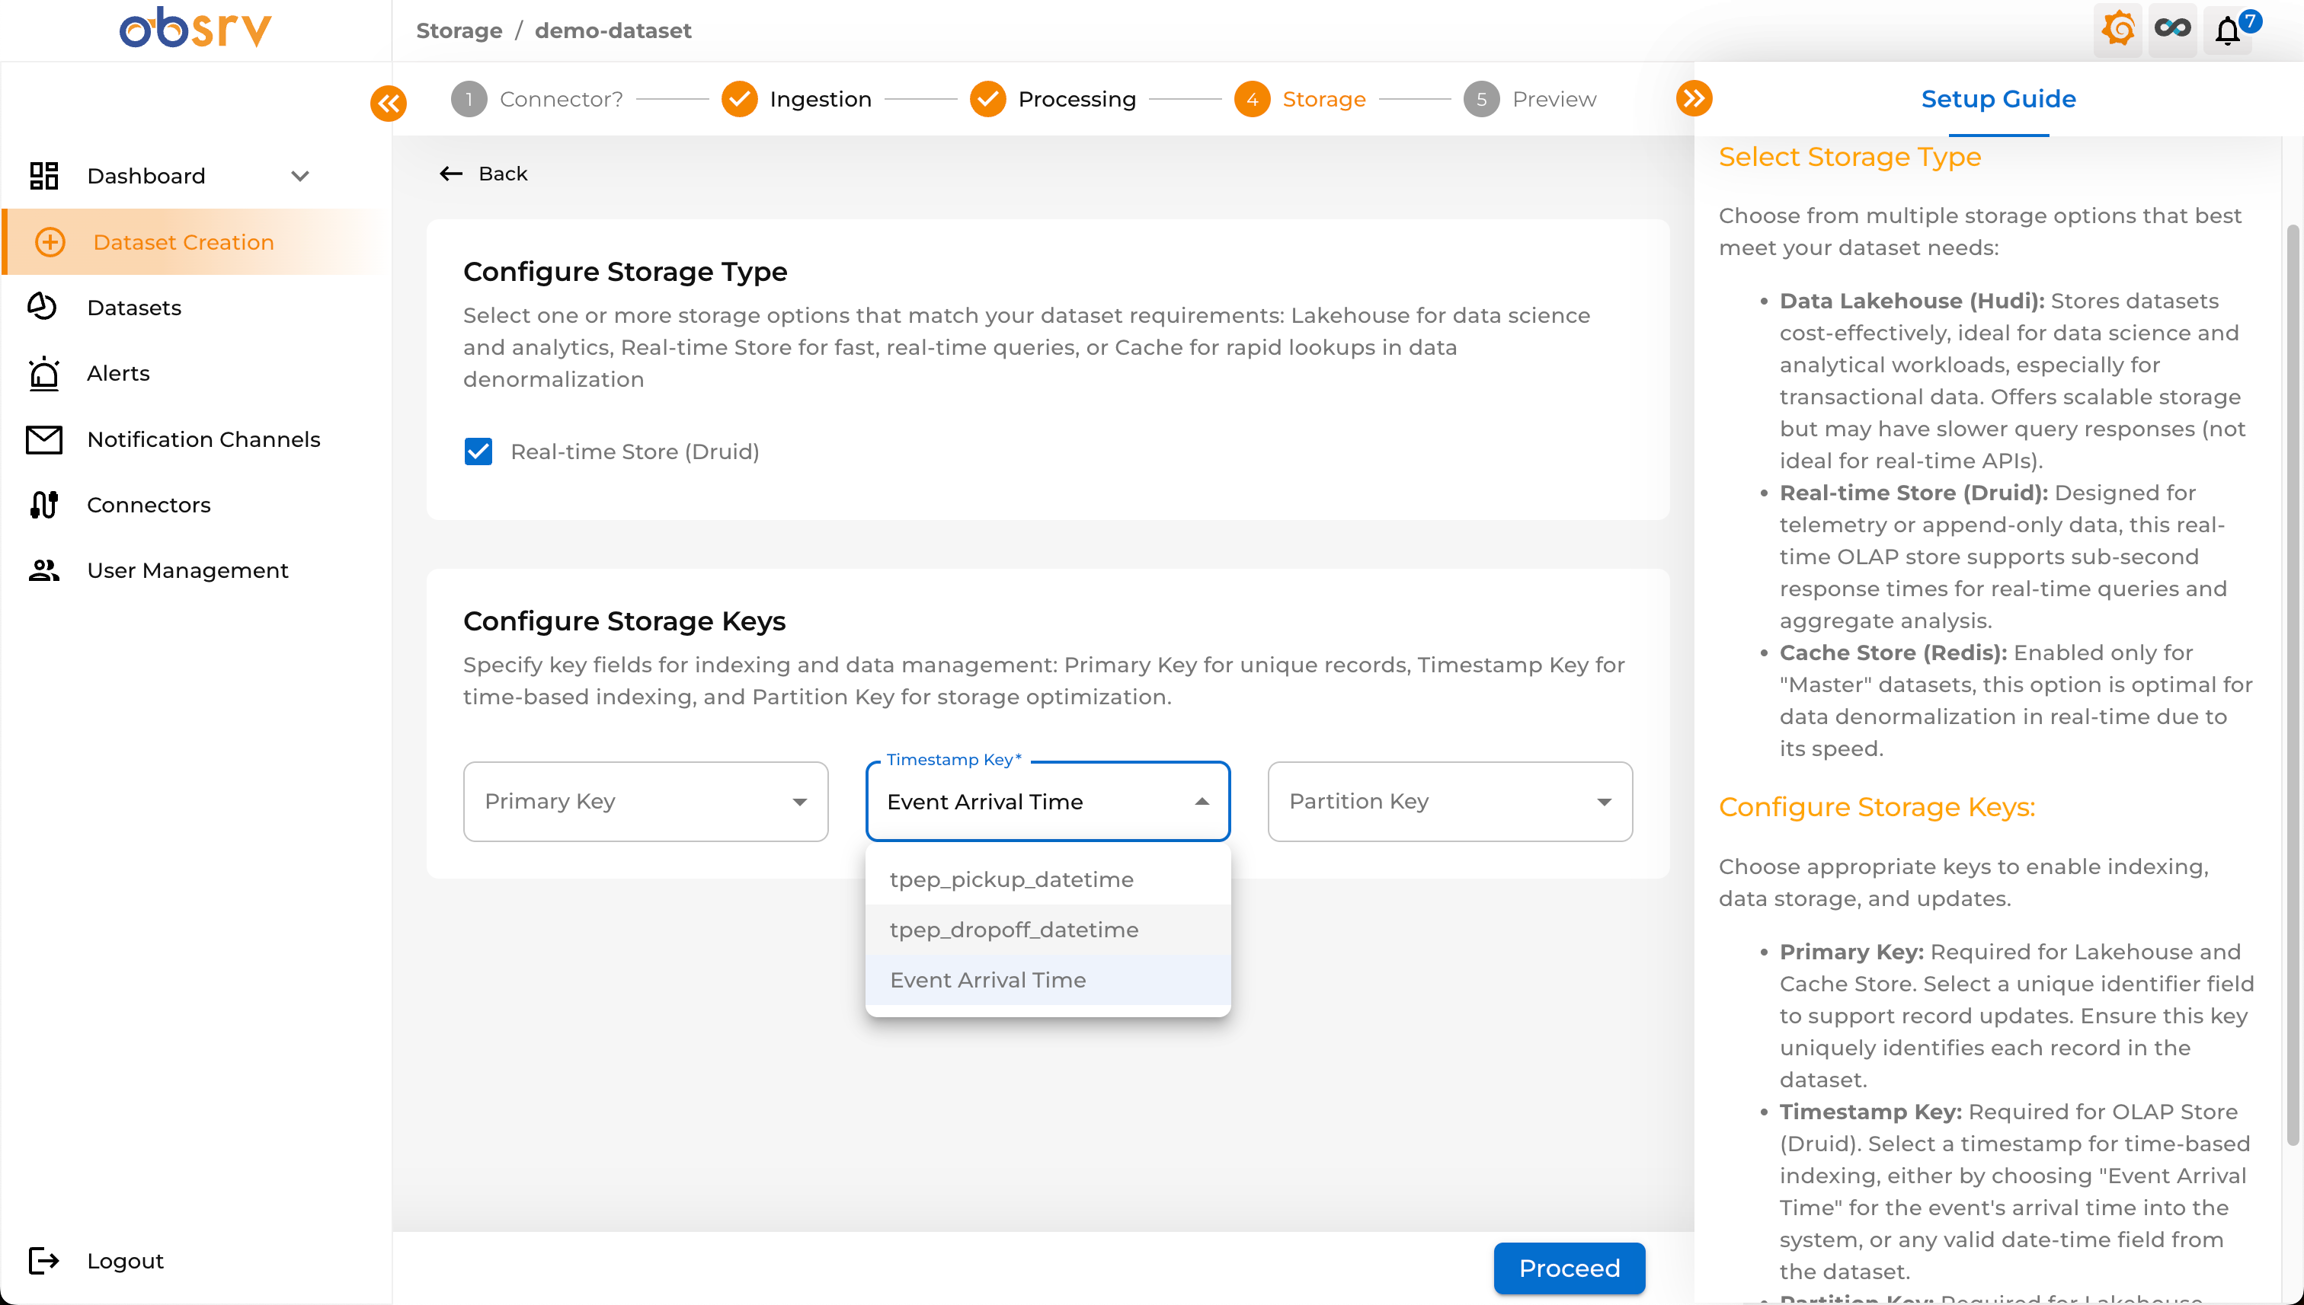
- You are now on the Storage step (Step 4).
- Configure Storage Type — select the storage system(s) for your dataset:
- Real-time Store (Druid): Optimized for fast aggregations and real-time analytics.
- Data Lakehouse (Hudi): For cost-effective storage, batch analytics, and data science workloads.
- Cache Store (Redis): For rapid lookups, typically used with Master Datasets.
- Configure Storage Keys:
- Primary Key: A unique identifier for each record (required for Lakehouse/Cache).
- Timestamp Key: The time field for time-based partitioning and querying (required for Druid). Defaults to Event Arrival Time.
- Partition Key: Field(s) used for partitioning data in the Lakehouse.
- Select the appropriate fields from the dropdowns, then click Proceed.
11. Preview Configuration
Section titled “11. Preview Configuration”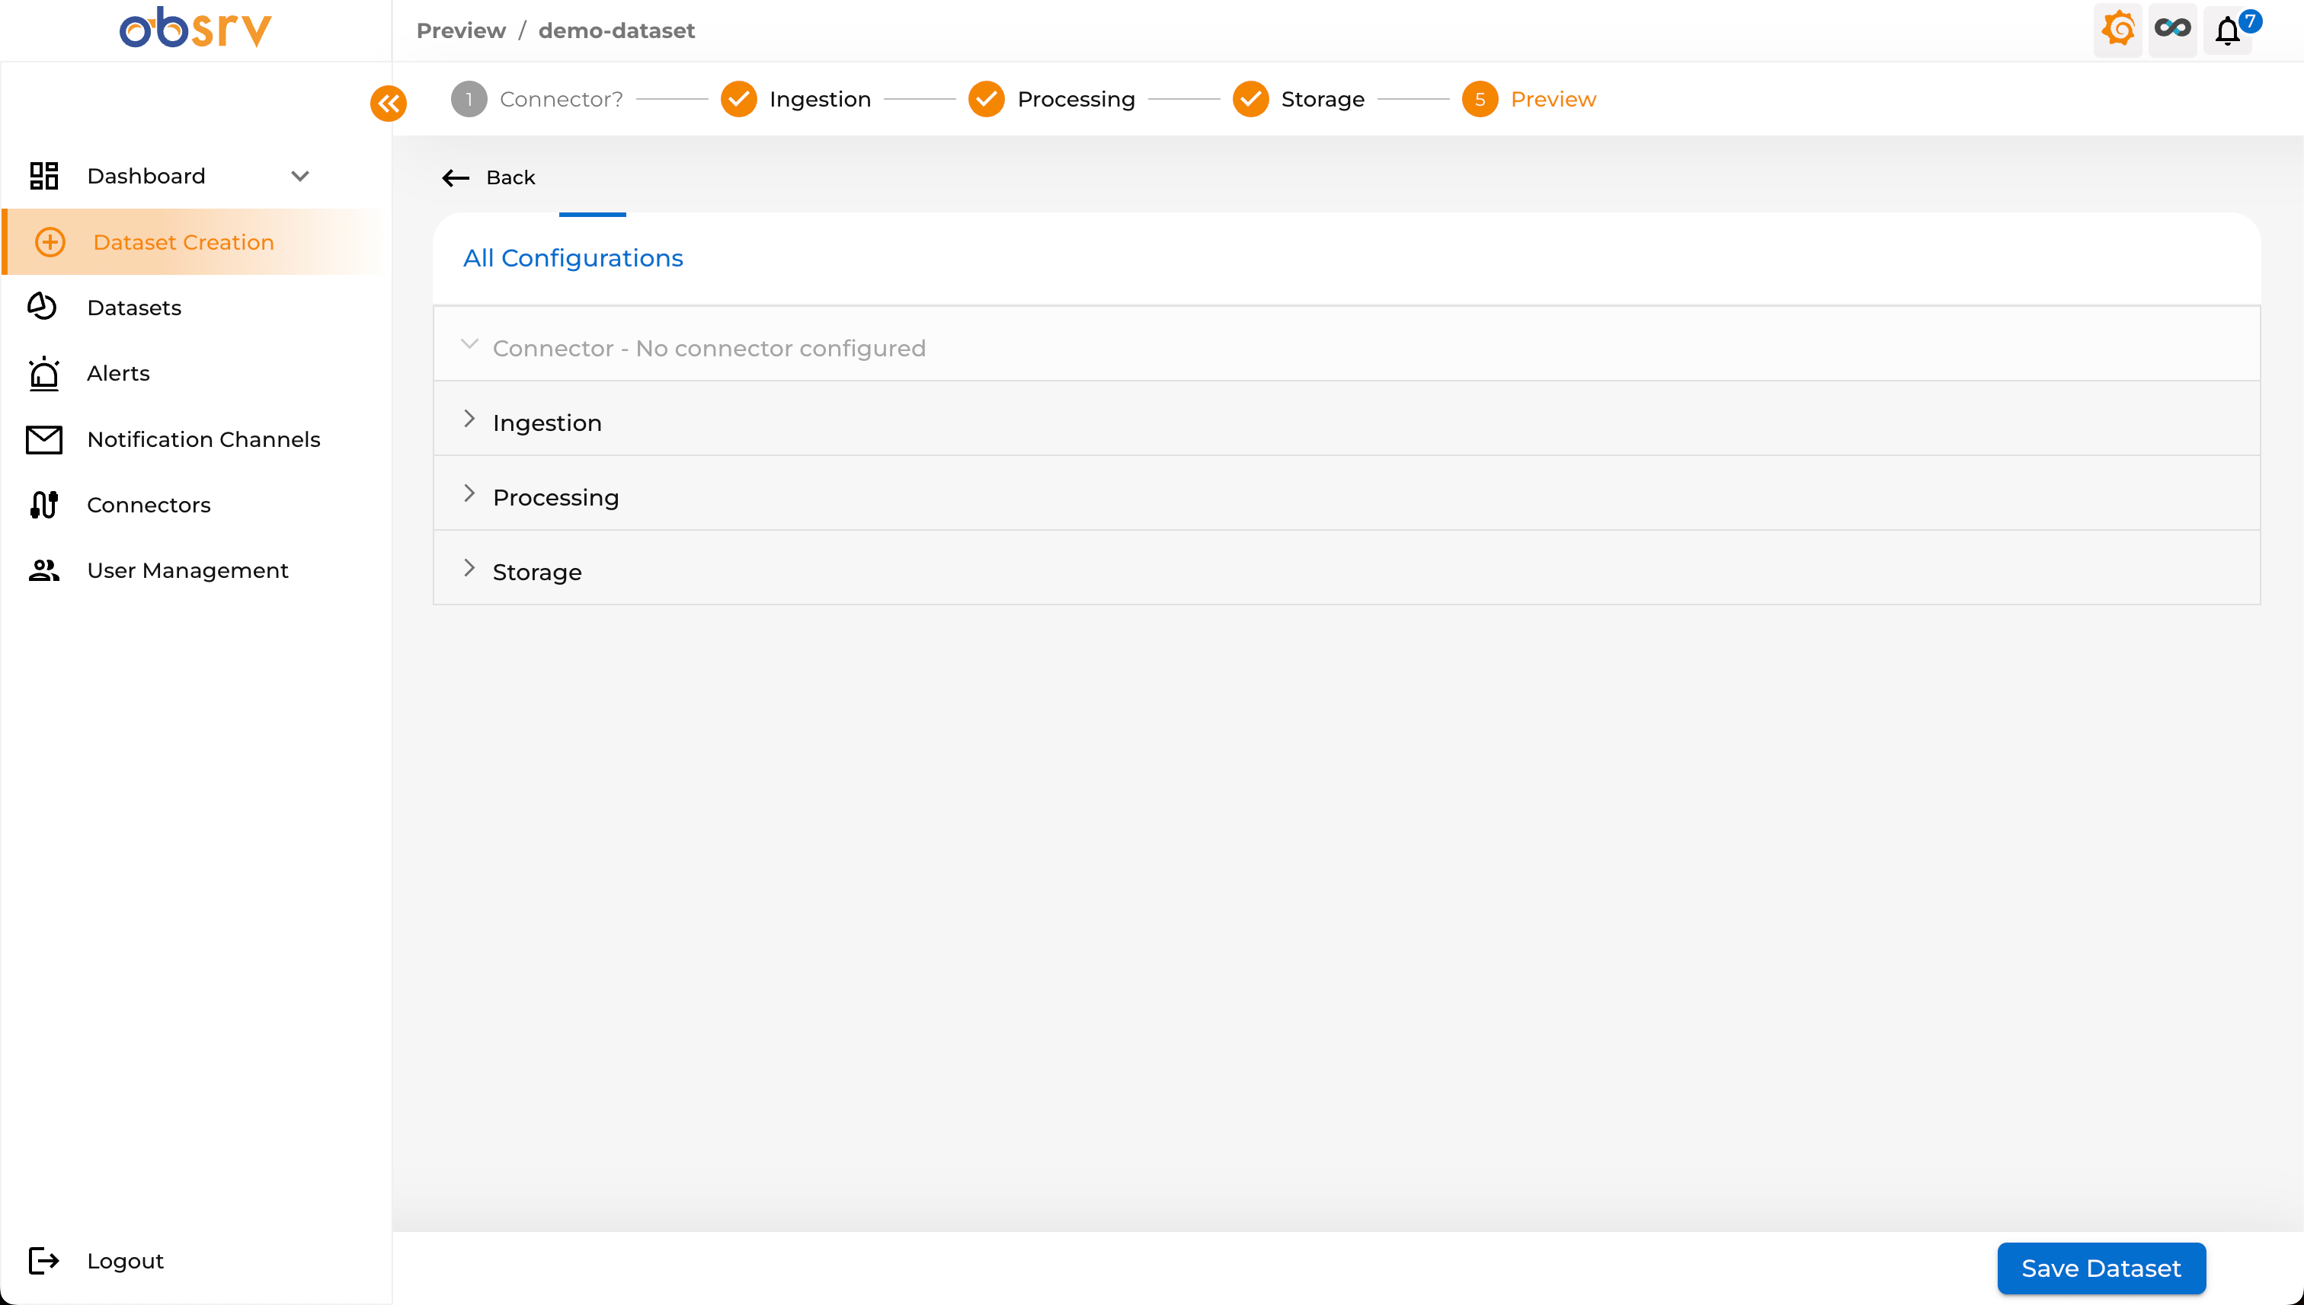
- You are now on the Preview step (Step 5).
- This screen summarises all configurations made across the previous steps.
- Expand each section (Connector, Ingestion, Processing, Storage) by clicking on it to verify the details.
- If you need to make changes, use the Back button or click the step number in the stepper at the top.
12. Save the Dataset
Section titled “12. Save the Dataset”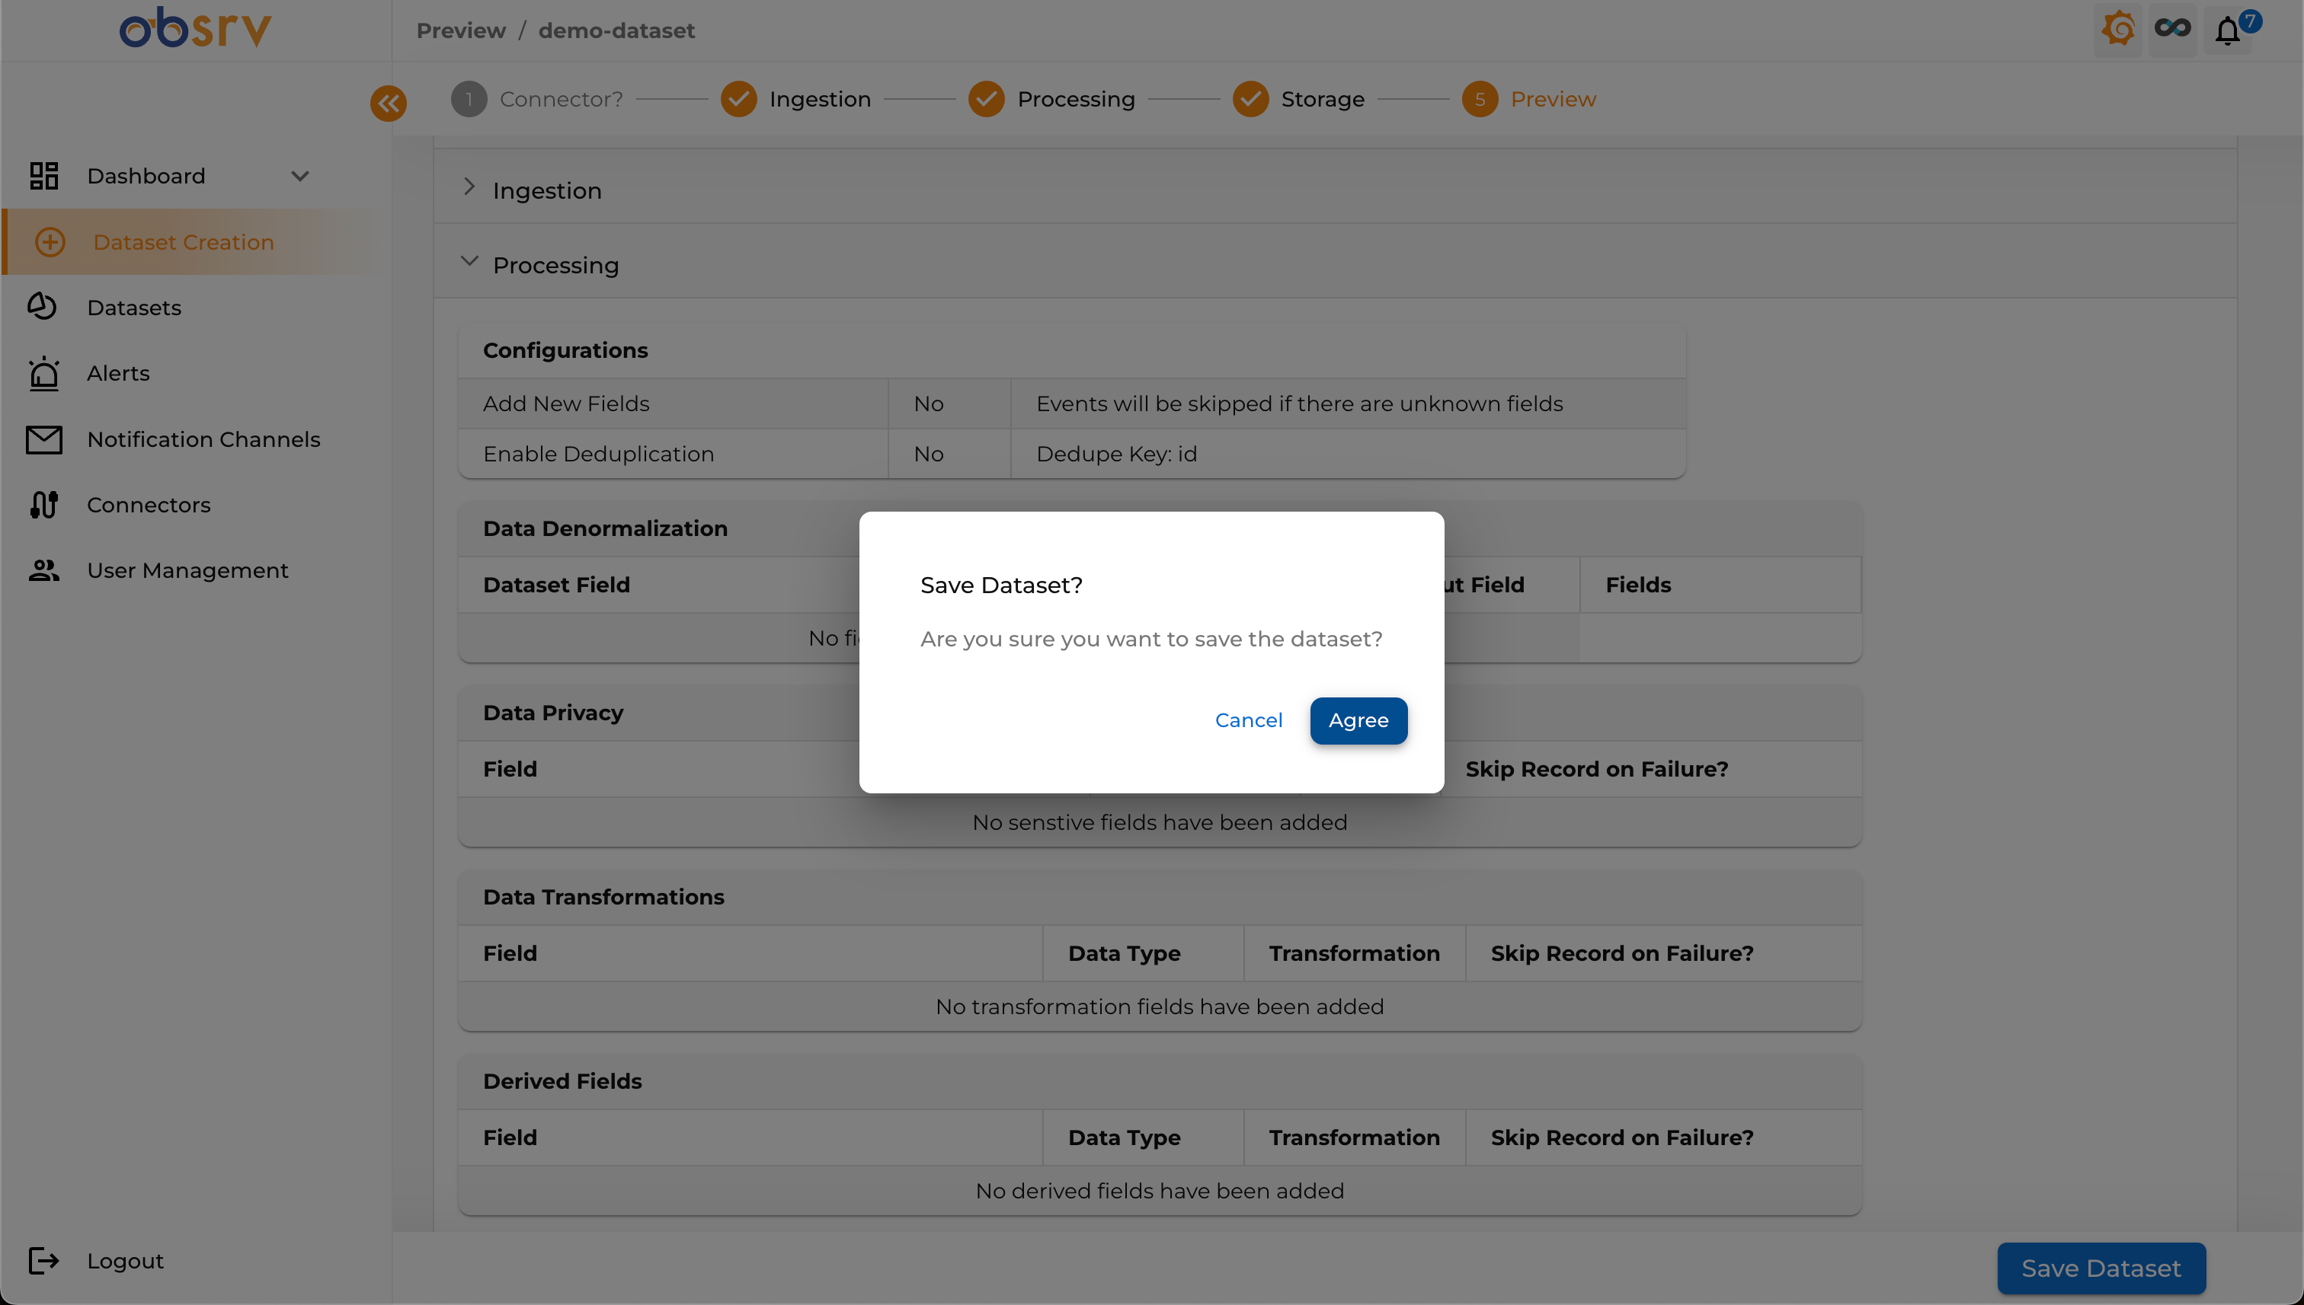
- Click the Save Dataset button at the bottom right of the Preview page.
- A confirmation dialog will appear — click Agree to confirm.
13. View the Dataset
Section titled “13. View the Dataset”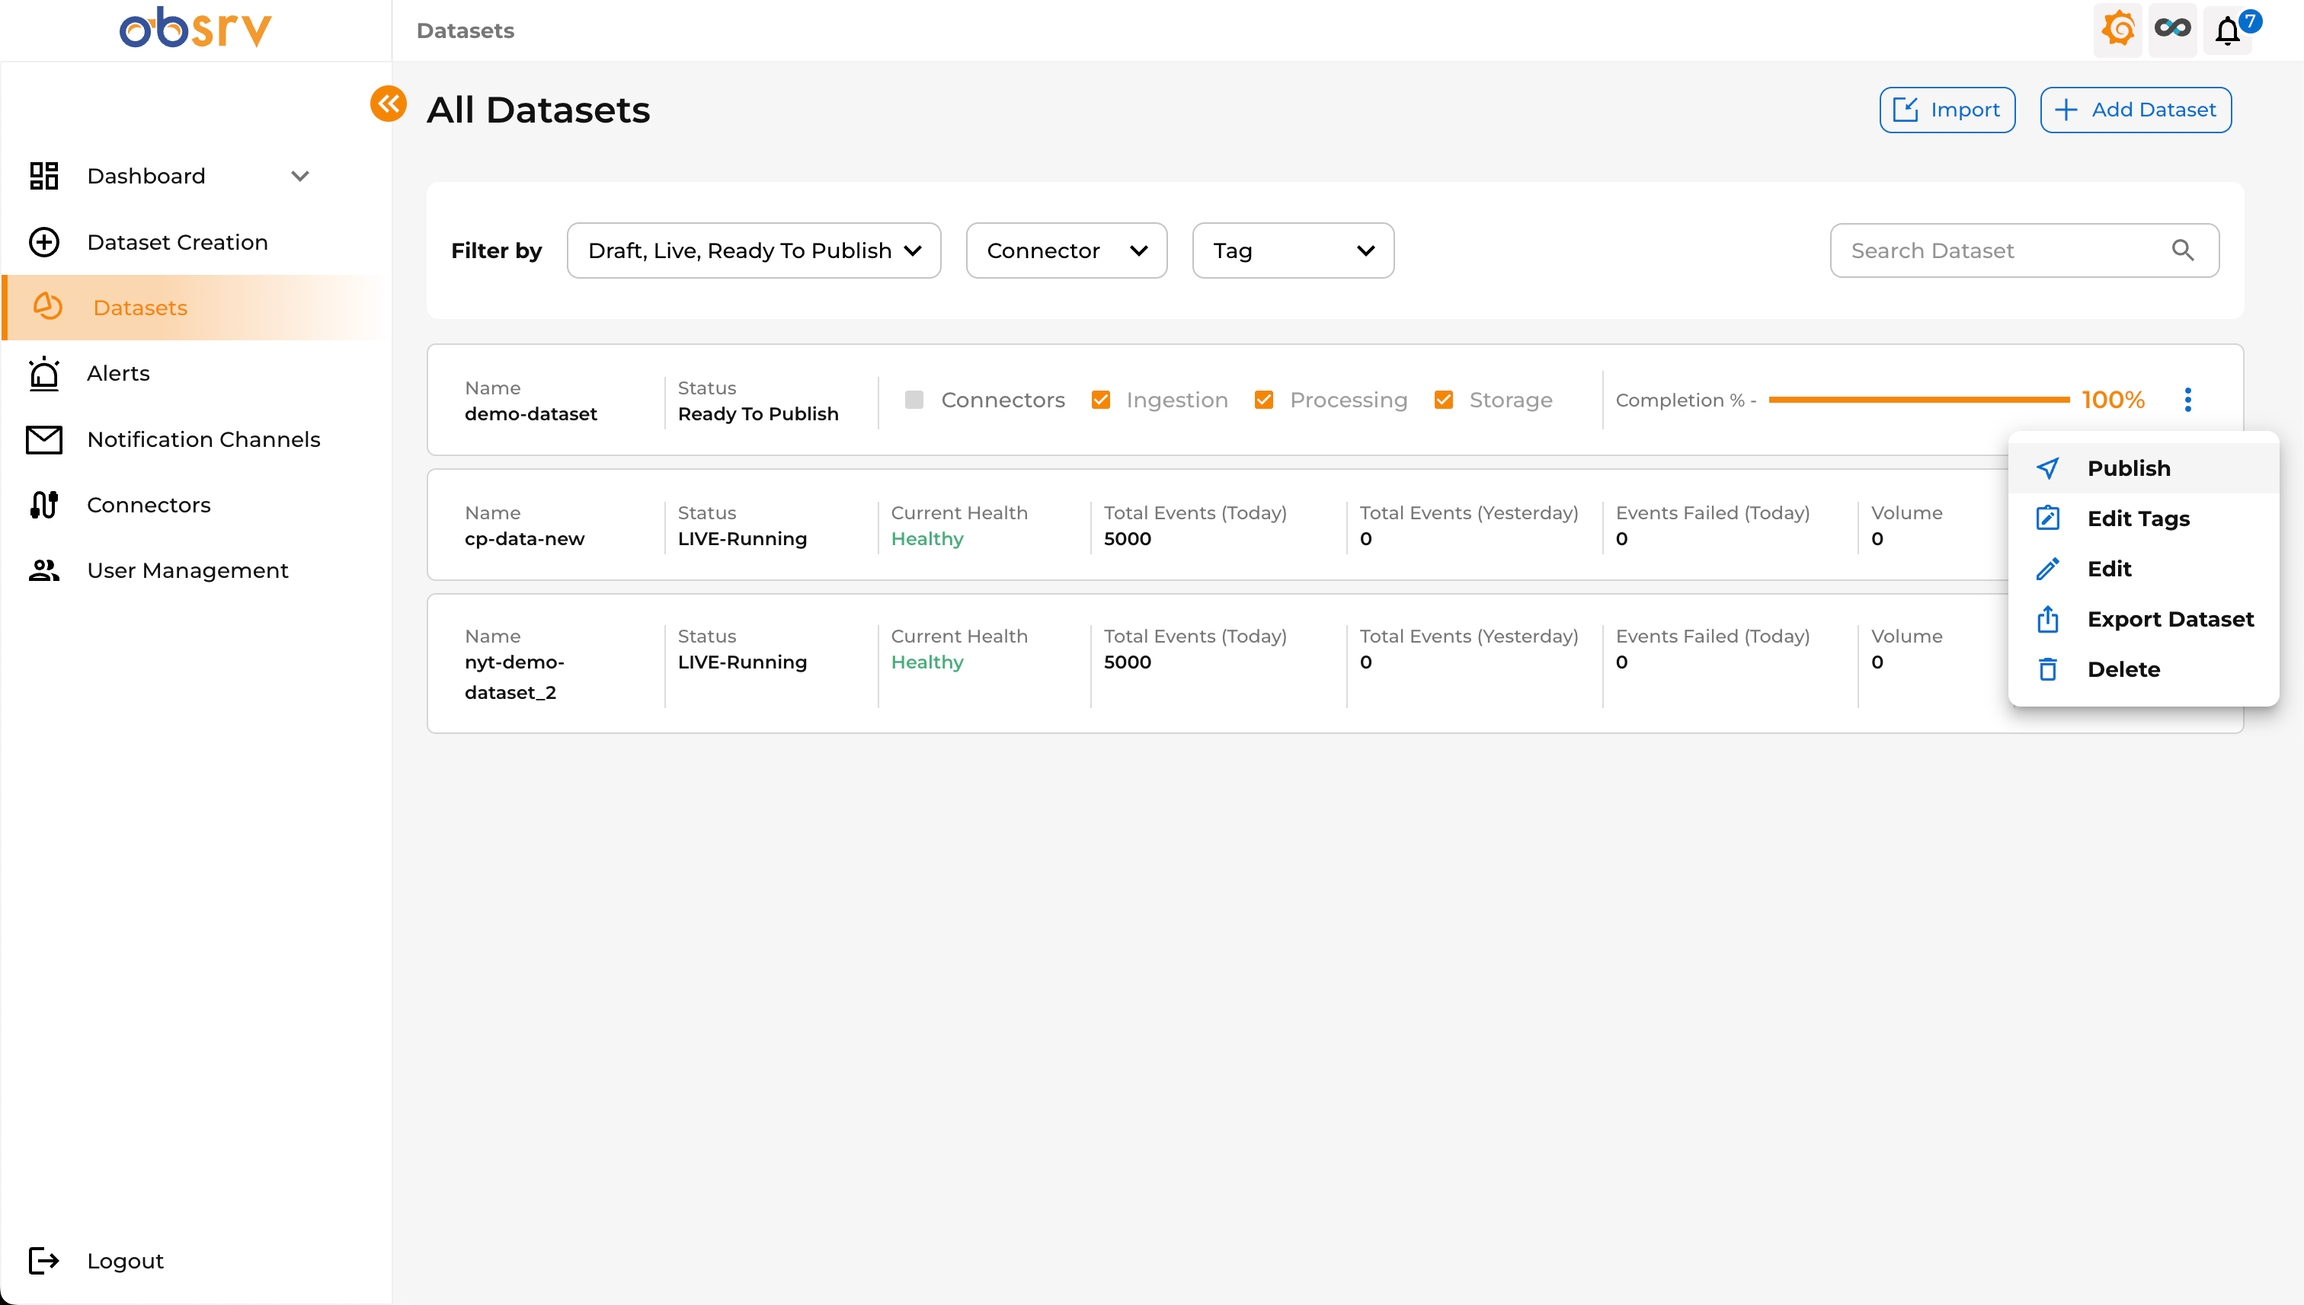
- You will be redirected to the All Datasets page.
- Your newly created dataset will appear in the list with the status Ready To Publish.
- To make the dataset active and ready to receive data, you need to publish it.
- Click the three-dot menu (⋮) on the right side of your dataset row and select Publish.
14. Publish the Dataset
Section titled “14. Publish the Dataset”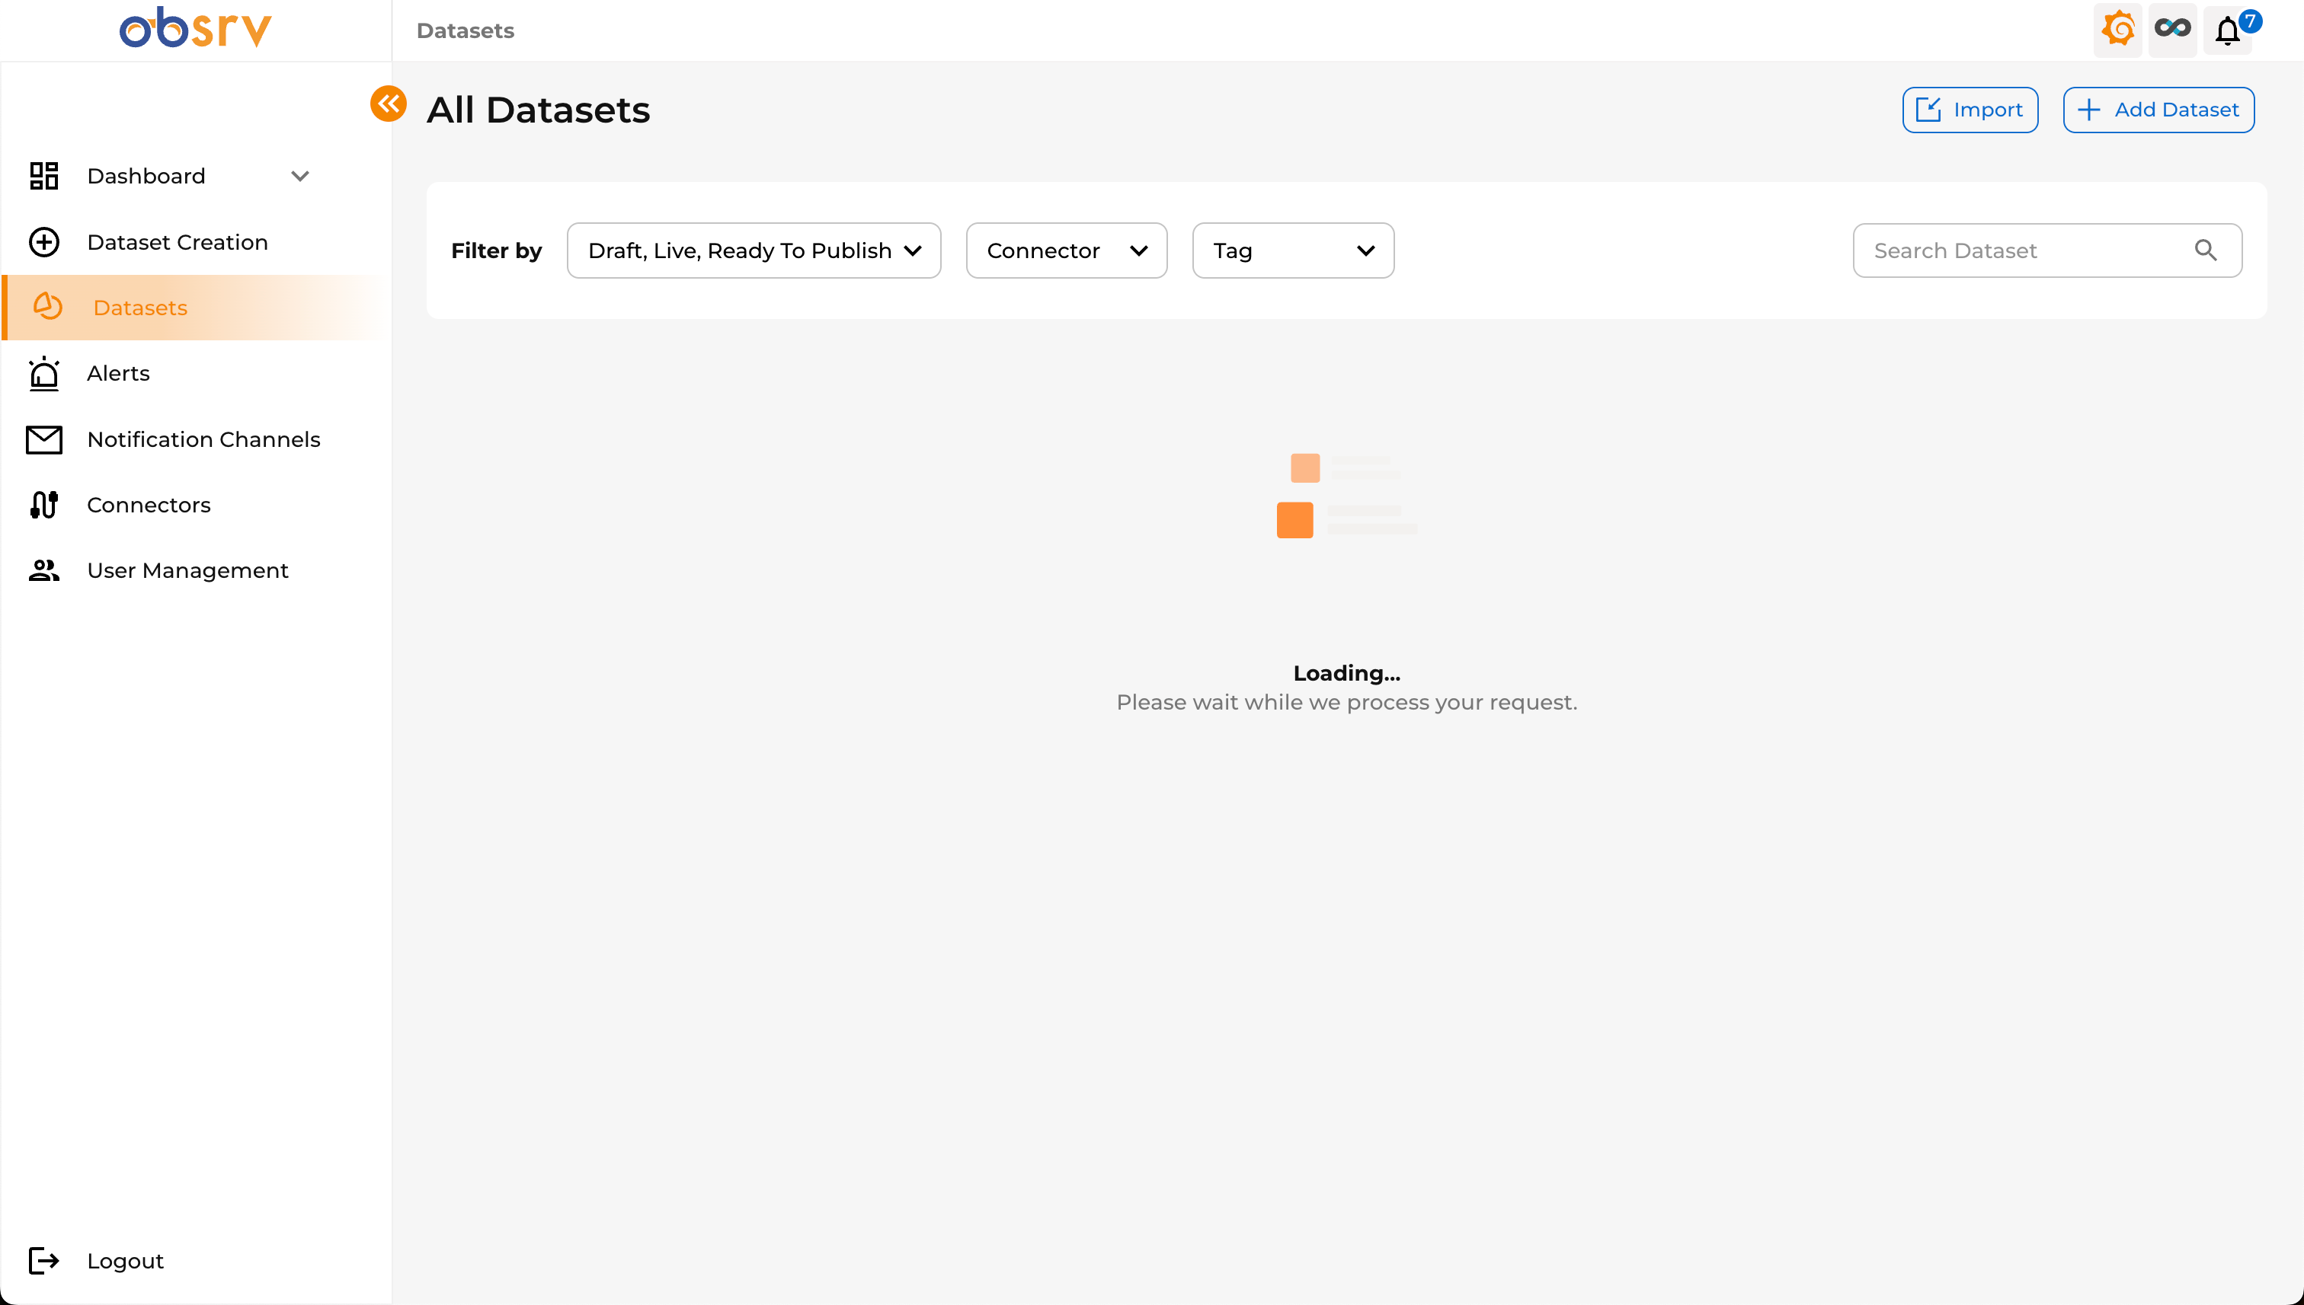
- A loading indicator will appear while the system processes the publish request.
- Once published, the dataset status changes to Live and it is ready for data ingestion based on the configured connectors or API endpoints.